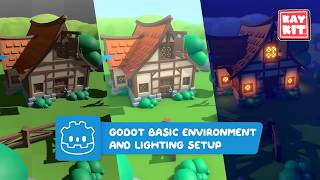
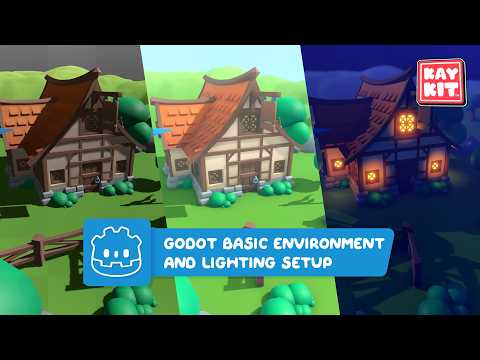
Basic Environment and Lighting Setup in Godot
We'll go over some basic 3D scene setup in Godot to improve the look of your game.
16 chapters
- IntroductionOverviewKay introduces a video covering basic 3D scene setup in Godot, including lighting settings and world environment configuration to improve the visual look of a game.Plan• Set up a daytime outdoor scene and light it • Turn that scene into a nighttime scene • Cover tips and tricks • Look at a dungeon scene for indoor lighting differencesScopeThis is not a fully in-depth video explaining every setting; it dips into lighting and post-processing basics, mostly intended for stylized cartoony scenes.ResourcesFree 3D models are available on Kay's website if viewers need assets to follow along.
- Default Preview NodesProblemWhen a scene is played, it looks different from the editor because no directional light or world environment has been added.ExplanationBy default, Godot replaces missing lighting with two preview nodes, represented by blue icons, for directional light and world environment.DemonstrationToggling off these preview nodes makes the editor view match the actual game view.Next StepThe creator will add a custom directional light and world environment instead of relying on the default preview nodes.
- Adding a Directional LightSetupAdd a new node, search for "light", and choose Directional Light 3D, which mimics sunlight.Positioning• Simply adding the light blasts the scene from the front and looks bad • Position the sun higher up and angle it downward • Rotate the Y-axis to see different lighting effectsShadowsEnabling shadows in the Light 3D node reveals how rotating the sun changes shadow positions, allowing fine-tuning for a good look.Energy and ColorThe light's energy controls brightness (increase or decrease), and color can be adjusted to set atmosphere; for now a bright solid white is used.
- Anti-AliasingIssueModel edges appear crispy and jagged under the new lighting.Fix LocationGo to Project Settings, then the Rendering tab, and search for anti-aliasing.Settings UsedTurn on both FXAA and TAA anti-aliasing solutions.ResultEnabling both removes the jagged edges and makes the overall scene look nicer.
- World Environment: Background and Ambient LightNew NodeAdd a World Environment node with a new Environment resource, which controls both lighting and post-processing.Background Setting• Two key modes: Sky and Custom Color • Sky mode allows a procedural sky or skybox • A custom pale blue color is chosen to represent the sky for this tutorialBackground ImpactThe background color affects more than the sky; an obvious color like red creates a red sheen over all assets.Ambient LightBy default ambient light sources from the background color; switching it to its own bright solid white color, then lowering energy to around 8 or 0.75, gives full control over the look.
- Contrast Effects: SSAO and SSILProblemAfter adding lighting and background/ambient settings, the scene still looks flat due to low contrast.SSAO• Screen Space Ambient Occlusion increases shadow value in crevices and where objects meet • Creates outlines under objects like tree trunks, fences, bushes, and bricks • Adds separation and contrast between objects, e.g., house vs. floor • Radius left at default; intensity raised to 3 for a stronger effectSSILScreen Space Indirect Lighting adds indirect light bounces; default settings are kept and it generally looks better when turned on, especially for outdoor scenes.OutcomeBoth SSAO and SSIL add a noticeable level of contrast when compared on and off.
- SDFGI and GlowSDFGIA global illumination solution favoring realistic lighting; considered too fiddly to set up for a stylized cartoony vibe, so it is not used in this tutorial.Glow OptionUsed later for emissive materials to make windows glow; values will need to be normalized for that purpose.BloomA very small amount of bloom is added to highlight bright things on screen.Contrast PurposeAmbient occlusion darkens dark areas while bloom brightens bright areas, together increasing overall visual contrast.
- Fog SettingsInitial AttemptTurning on fog creates a thick gray layer over everything, which is too dense and not the desired subtle effect.Color MatchingCopying the sky color for the fog color helps blend the horizon and distant elements with the sky.Density Tweaks• Density reduced to half the original value • Reduced by half again for an even subtler effectFinal EffectOffscreen tweaks to background color, fog color, and fog light energy create a subtle blend of sky and landscape in the distance, improving the distinction between foreground and background.
- Depth of FieldSetupAdd a new Camera Attributes Practical resource to the camera to access depth of field and exposure options.Initial ResultEnabling depth of field blurs the background; adjusting amount and distance sliders initially creates a harsh, distinct cutoff line.RefinementDistance is set far away and amount is reset to make the blur effect subtle rather than harsh.Use CaseSettings depend on camera type and player view; a third-person camera benefits from a blurry background that accentuates the foreground as more important.
- Adjustments and Before/After ComparisonAdjustment SettingsBasic image editing controls like brightness, contrast, and saturation; contrast is raised to about 1.15–1.2 since stylized cartoony environments thrive on contrasty colors.ComparisonDeleting the World Environment node reveals the original look, showing a big overall difference despite each individual change being subtle.Personal PreferenceMany settings, like fog, are a matter of personal preference and the desired vibe (e.g., a dark spooky game would avoid bright colors).Scene-Specific TuningSettings like background color, fog color, and ambient light were tailored specifically to this green grasslands scene.
- Changing Scene Atmosphere: Desert ExampleStarting PointThe current blue sky and sand-colored environment resembles a beach scene.Desert TransformationChanging the fog color (which affects the sky) to a yellowy or tan color gives the scene a desert feeling.Heat EffectSlightly warming the ambient light color enhances the feeling of a sweltering hot desert.TakeawayEven small changes in ambient light can have a big effect, showing the value of tailoring world environment settings to the exact scene.
- Nighttime Scene SetupStarting PointTurn off the directional light, set ambient light to zero, change sky color to black, and remove the fog's sky effect, resulting in a completely dark scene.Visibility AdjustmentIncreasing ambient light alone makes the scene look too much like daytime again.Color Solution• Change ambient light color to a dark blue to keep a nighttime feel while staying visible • Match the sky color to a very dark blue • Adjust the fog color accordinglyMoonlightRe-enabling the directional light (now acting as a moon rather than a sun) requires turning its energy way down, to around 0.1–0.2.
- Glowing Windows at NightTwo ComponentsGlowing windows are created using an emissive material plus a set of Omni lights placed near each window.Emission SetupEmission is enabled in the material slot of the window asset; color and energy of the emission can be adjusted.Alternative TrickIf an asset isn't set up with an emissive material slot, create a new plane with Mesh Instance 3D, assign a material with glow enabled, and place it over the window (a sphere can be used similarly for light bulbs or candles).Combined EffectUsing emission and Omni lights together creates a believable cozy glow; using only one of the two effects looks noticeably worse.
- Indoor Dungeon Scene LightingScene SetupAn indoor dungeon scene was built using the KayKit Dungeon Pack, starting from a default Node3D with preview nodes enabled.Localized Lighting• No large sunlight source available indoors, so localized lighting is used instead • Omni lights placed at candles and a torch, colored orange with shadows enabled • Omni lights used to paint in light for aesthetic purposes or to highlight areasArea LightAn Area Light is used in one room, emitting an even distribution of light based on the shape and size of a white square, ideal for sources like a large window or skylight.VarietyMixing torch-lit rooms and area-lit rooms creates a more interesting experience for the player.
- Indoor Background, Ambient Light, and FogBackgroundNo sky or background is used indoors; it's simply set to black, reducing visual clutter, especially effective for isometric or top-down views.Extra DetailA black mesh shaped like the dungeon is added at the edge of the walls to hide wall sides and further isolate the interior.Ambient Light BalanceDefault ambient light energy of 1 is too bright and loses shadow effects; energy is lowered enough to keep nice shadows while remaining visible.Height FogHeight-based fog is used instead of distance fog to create a ground fog effect; increasing it further can create a spookier atmosphere by limiting player visibility.
- ConclusionRecapThe video covered basic lighting and world environment settings for daytime, nighttime, and indoor scenes in Godot.Not Covered• Tone mapping • Volumetric fog • Camera and FOV settings • Glow • Reflection probesEncouragementViewers are encouraged to experiment with these additional settings themselves to further improve visuals.ClosingKay hopes viewers learned things applicable to their own projects and invites topic suggestions for future videos in the comments.