
Make your drums 3 dimensional (easy method)
6 chapters
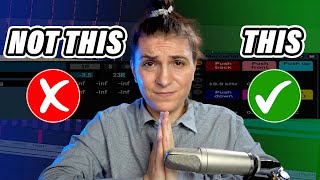
- Understanding 3D Sound PrinciplesSound BehaviorSound spreads through air and reflects from left and right. High frequency waves lose energy faster than low frequencies, making them harder to travel long distances.Distance Cues• Distant sounds are perceived with lots of reflection and low-end emphasis • Underground sounds have reduced high frequencies because solid materials block them • Elevated sounds are rich in high-end frequencies without reflections from aboveMixing ToolA custom-built rack with four buttons allows moving sounds around the spatial field to create depth.Key Techniques• Push back: Low pass filter, dark room reverb, increased width for background illusion • Push front: Opposite effect for close, in-your-face sound • Push up: Sound positioned higher in the mix • Push down: Sound positioned lower, underground feeling
- Processing Claps and Hi-HatsBright ClapThe bright clap is positioned in the background, so push it to the front and slightly up to bring it closer.Back ClapThe back clap is too far forward, so push it to the background to create separation between the two claps.Open Hi-HatOpen hats are splashy and tend to reflect naturally. This one is focused in the middle from a mono source, so push it around for more spaciness and room feeling.Closed Hi-HatThe closed hi-hat is naturally transient and snappy. Keep it in the middle to complement the open hat with sharp snap collapse.
- Shakers, Organic Sounds, and CongosShaker Placement• First shaker already splashes right and left naturally, so leave it untouched • Second shaker is super panned and can get mushy, so place it in the middle with a little front positioningOrganic ElementsTwo similar organic sounds can talk to each other by panning one left and one right, creating a ping-pong effect.Congo PositioningCongos naturally come from the bottom and have natural reverb, so push them down and back to emphasize this character.Room AmbienceAdd dark room reverb and additional effects to the congos to give them more room ambience and organic feel.
- Snare Roll and Effects ProcessingSnare Roll DynamicsMimic real drummers who increase velocity while going up. The sound comes from the background at the beginning and becomes brighter as it approaches.Automation Technique• Automate push back at the beginning of the roll • Transition to push front very fast for the last hits • Push up slightly on the final hit to add elevationAmbient ElementsAmbient hits placed strategically to complement the snare roll automation.Crash CymbalBring the crash from behind to the front like the snare. Focus it in the middle with a slight upward push, creating a beautiful effect of the crash going back after the impact.
- Drum Bus Glue and CohesionBus Processing• Use a drum bus to glue all elements together so the drum kit sounds like a single orchestra • Chain includes compressor, EQ, overdrive, another compressor, reverb, low-cut, and kick sidechainReverb IntegrationAdd reverb to the drum bus to make the tails come together and create more glue between elements.Group CohesionCreate a reverb group to put all drum elements into the same room, creating overall coherence.Mixing PurposeCombining these techniques prevents individual drums from playing randomly and ensures they sound like a unified instrument.
- Send Effects and Room IntegrationSend StrategySend certain drum elements to different effects (echo, delay, reverb) to enhance room feeling without making everything sound the same.Clap Effects• Send the bright clap to a slap delay to enhance the room feeling • Send the back clap to a longer delay echo, making it sound like hitting an echo in the distanceAdditional EffectsUse slap reverb on other elements to add confusion and depth to the listener's perception.Overall CoherenceSend some elements to the room reverb and others to the master room so everything sits together coherently, preventing drums from floating outside while other instruments are in the room.