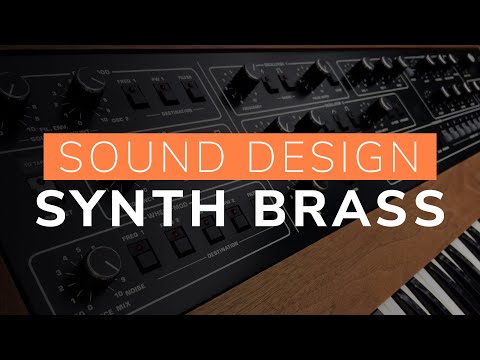
Sound Design Tutorial - Synth Brass
8 chapitres
- Introduction and Sound DemonstrationSeries OverviewThis is part of the sound design and synthesis series, focusing on creating synth brass inspired by great synthesizers and songs from the 80s and 90s.Sound DemoThe instructor demonstrates the finished synth brass sound, showing how it can be played with different expressions and emotions depending on the register and octave used.Tool UsedThe patch is created using Serum, chosen because its controls are easy to find, though the same sound can be recreated in any synthesizer.Versatility• Opening the filter lets more high frequencies through • Different chord voicings create different emotional expressions • The synth adapts well to various playing styles and registers
- Oscillator Setup and DetuningInitializationStart with an initialized preset, then select basic shapes and choose saw waves for both oscillator A and oscillator B.Filter SetupEnable the filter, route both oscillators through it, and reduce the cutoff to create a smoother starting sound without excessive high end.Detuning TechniqueIncrease the fine tuning of oscillator B to about 10 to create width and movement between the two oscillators through phasing and warping effects.Unison Voices• Add 2 voices of unison on the first oscillator with 0.1 detune • Add 3 voices of unison on oscillator B with 0.1 detune • Keep unison voices moderate to maintain a vintage analog sound rather than a modern one
- Amplitude and Filter Envelope DesignVolume Envelope• Attack: set to approximately 15 milliseconds • Decay: set to approximately 300 milliseconds • Sustain: reduce by a few dB (2-3 decibels) • Release: add approximately 200 millisecondsEnvelope Curve ControlThe release and curve tension control how the sound fades away; adjusting the middle point changes the fade character dramatically.Filter Envelope SetupAssign envelope 2 to control the filter cutoff by dragging it onto the cutoff parameter to create the classic pluck effect.Filter Envelope Settings• Attack: approximately 100 milliseconds for gradual filter opening • Hold: leave at default • Decay: approximately 1.3-1.4 seconds • Sustain: approximately 70% • Release: approximately 200-300 milliseconds
- Filter Selection and DriveFilter Type ChoiceUse a Moog low-pass 12 dB per octave filter, which provides a good balance; higher slopes like 24 dB per octave cut too much high end and sound artificial, while lower slopes like 6 dB per octave only gently tame the high end.Filter Characteristics• 12 dB per octave maintains brightness while preserving the brassy character • 24 dB per octave creates a more pad-like sound • Lower slopes provide subtle high-end reductionDrive AdditionAdd a small amount of drive to the filter (around 20%) to add texture and attitude without making the sound too crunchy.Sound ResultThe filter setup creates a smooth, warm brass tone that is neither too bright nor too dark, with subtle harmonic coloration from the drive.
- Velocity Response and Signal RoutingVelocity AssignmentSet both oscillator levels to zero, then assign velocity to control the oscillator output so the synth responds dynamically to how hard you play the keys.Responsiveness Benefits• Soft key strikes produce quiet sound • Hard key strikes produce full sound • Makes the synth feel more dramatic and expressive • Creates more natural and responsive playing experienceAdditional Velocity ControlYou can optionally link velocity to the filter cutoff so harder key strikes produce brighter sounds and softer strikes produce more muted sounds.Patch CompletenessThis velocity assignment is considered critical for bringing synthesizer patches to life and making them feel more organic.
- Effects Processing and Spatial EnhancementEffects FilterAdd a Moog low-pass filter in the FX section to cut excess high-end and fit the sound into your track; this separate filter preserves the original filter settings and only adjusts tonal balance.Chorus Addition• Turn on chorus effect with mix adjusted to around 50% so it's subtle • Adjust depth to control width effect • Keep rate moderate to avoid sounding silly • Creates width and movement in the soundReverb ApplicationAdd reverb with low-end cut, adjusting the mix to suit your needs; either keep it dry or drench it in reverb depending on your mix requirements and desired acoustic space.Delay Effects• Add subtle ping pong delay with eighth note or quarter note timing • Filter out some top-end and low-end from the delay • Creates swirl, dimension, and rhythmic interest • Helps fill gaps in the groove
- Wave Selection and Sound ModificationAlternative WaveformsInstead of basic saw waves, experiment with textured saw waves like Anna saw rounded, which naturally round out the sound without requiring excessive filtering.Wave Characteristics• Classic analog synthesizers have imperfect, textured saw waves • Saw waves are often rounded off, jagged, or have extra harmonic content • Adding imperfection and drift to oscillators creates interesting, less sterile sounds • Serum tends to be too clean and perfect, so dirtying it up improves the brass soundSound SofteningUsing textured saw waves creates a much softer, gentler brass sound without the need for excessive filtering, EQ work, or filter adjustments.Design PhilosophyPrioritize interesting, characterful sounds over perfect, clean sounds; slight imperfections in the waveform make the synth sound more organic and vintage.
- Envelope Attack Modification and Final TechniquesAttack Time AdjustmentIncreasing the attack of envelope 1 gradually transforms the sound from quick percussive brass to pad-like atmospheres that work around the groove.Attack Use Cases• Quick attack (current setting): percussive, immediate brass response • Slightly increased attack: softer, more pad-like character • Longer attack: works better as atmospheric elementsSidechain EmulationFor bass notes, add a small amount of attack to emulate a sidechain effect so the synth naturally fits around the kick and bass rather than clashing with them.Sound Bank UpdateThis patch and other new sounds will be included in a free update for the In The Mix Serum Essentials sound bank, with more presets being finalized.