
![How to Make a Killer Drum Rack (Free Rack) [ Ableton Tutorial ]](https://img.youtube.com/vi/sqGZ-PgsUTo/hqdefault.jpg)
How to Make a Killer Drum Rack (Free Rack) [ Ableton Tutorial ]
9 chapitres
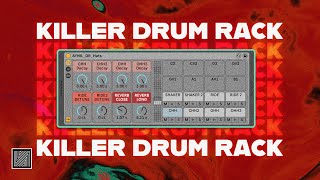
- Introduction to Drum Rack WorkflowConcept OverviewIntroduction to creating a custom drum rack in Ableton that allows for instant control of delay, reverb, pitch, and decay with a single control interface.Problem with Previous Setup• Kick drum needed separate treatment to avoid complications when adding effects • Reverb and delay on multiple drum elements created workflow conflicts • All drums in one rack limited flexibility for individual processingNew ApproachSeparating kick, tom, and hats into individual tracks allows for independent effect control and better creative flexibility during production.Alternative Methods• Drum selector option useful for Push workflow without track switching • Individual tracks preferred for more control and variation possibilities
- Building the Core Drum Rack StructureEssential Components• Drum Rack as the main container • Simpler instrument for loading drum samples • EQ for tonal shaping • Utility for level control • Saturator for harmonic enhancementChain SetupCreate duplicate chains for each drum element: closed hat, open hat, second open hat, shaker, and two rim variations, allowing for stereo separation and variation.Renaming ChainsEach chain represents a specific drum element with custom names for easy identification and workflow optimization.Doubling StrategyDuplicate certain elements like open hat to create one centered version and one spacious stereo version, providing textural diversity within the same drum sound.
- Sample Loading and Sampler ConfigurationLoading TechniqueDrag samples directly into the Simpler instrument, not into the empty space, to preserve all macro mapping and automation settings.Envelope Settings• Disable Retrig to allow samples to play fully without interruption • Remove sustain to ensure samples aren't held indefinitely • Set release to maximum to let samples complete naturallyRetrig ExplanationWhen Retrig is activated, each new note trigger restarts the sample from the beginning instead of allowing it to play continuously, which is undesirable for drum samples.ResultSamples now play their full length with natural decay, creating proper drum articulation and sustain behavior.
- Macro Mapping for Control and VariationDecay MappingMap decay to a macro parameter with a maximum range of 3 seconds instead of 60 seconds, allowing precise control and easy automation for adding movement and variation to hats.Pitch Mapping• Use detune instead of transpose for a more subtle pitch control • Map first rim to macro 5, second rim to macro 6 • Detune range provides smooth variation without being too aggressiveVariation BenefitsMapped controls allow real-time adjustment during performance and automation within the DAW, creating dynamic changes throughout the track.Automation CapabilitiesAll mapped macros can be automated to create evolving textures and gradual parameter shifts across different sections of the music.
- Individual Track Processing ChainSidechain CompressionAdd sidechain compression to open hats and shaker to create space for the kick drum with short attack and varied depth settings.Stereo EffectsApply stereo compressor and delay effects to open hats and shakers to place them in the stereo field, creating width and spatial dimension.Element-Specific Processing• Open hats: stereo compression and spatial effects • Shaker: similar stereo treatment for cohesive sound • Rims: flexible positioning between center and stereo depending on mix needsSignal Flow PriorityPlace most-used tools like saturator and EQ in the main chain before effects, eliminating the need to recall them repeatedly.
- Reverb Return Tracks SetupTwo Reverb StrategyCreate short and long reverb returns to provide different spatial options for various drum elements depending on desired effect.Short Reverb Configuration• Assign decay to macro 7 for quick access • Suitable for closed hats, open hats, and tonal clarity • Add subtle saturation and EQ to control low-frequency buildupLong Reverb Configuration• Set decay around 5 seconds and map to macro 8 • Ideal for rims and washout effects • Includes additional stereo processing for spatial enhancementReturn Channel SetupSet dry/wet to 100% wet, add saturation and EQ before reverb algorithm to shape the effect character before processing.
- Delay Return Tracks and Effects SelectionFour Delay ConfigurationCreate four different delay returns, each tuned for specific purposes: shuffling effect, ping-pong stereo, staggered timing, and long syncopation.Delay 1 and 2 Setup• Delay 1: ping-pong effect with 100% feedback at 30%, synced to 3 • Delay 2: ping-pong with feedback at 30%, synced to 2 for different timing • Both create movement and rhythmic interestDelay 3 and 4 Setup• Delay 3: staggered effect with synchronized timing • Delay 4: dotted eighth note timing creating unique rhythmic flavor • No ping-pong effect for cleaner, more controlled resultIntegration StrategySend all delays into reverb returns to blend delay and reverb effects together, creating cohesive wet signal that mixes smoothly without muddiness.
- Mixing and Final CustomizationSend Level ControlAdjust individual send levels to reverb and delay returns, typically around minus 17dB, to balance wet effects without overwhelming the dry signal.Mixing Strategy• Use send faders to control effect intensity on each drum element • Adjust volume and pan for each drum track to create balance • Close hat and shaker receive more reverb than open hatDrum Bus MasterAdd a drum bus on top to glue elements together, using utility and compressor to control dynamics and transient reduction.Final PolishUse drum bus to reduce reverb transients slightly and achieve overall cohesion, making all elements sound unified while maintaining individual character.
- Conclusion and Resource DistributionRack FunctionalityThe completed drum rack provides sophisticated control over all elements with complete macro automation capability, suitable for performance with Push or standard DAW workflow.Available Resources• Free drum rack download available in video description • MIDI file of the demonstrated drum pattern included • All samples from Big Time Techno sample pack and December packSample Pack References• Big Time Techno sample pack: used for kicks and hats • December pack: provides additional hat variations • Waste Table Techno Bank: contains the acid line presetFinal ThoughtsThis rack enables creative exploration and quick experimentation with drum sound design while maintaining professional organization and control throughout the production process.
![Complete guide to Techno Drums Pattern (Beginner to Pro) [+free project]](https://img.youtube.com/vi/_0dyDJcX9aY/mqdefault.jpg)


![How to Make Industrial Techno Groove (Free rack) [Ableton Techno Tutorial]](https://img.youtube.com/vi/wRhbl6N5BJs/mqdefault.jpg)