
![How to Make FAT Techno Stab (free rack) [Ableton Techno Tutorial]](https://img.youtube.com/vi/NB2EnmQeRgY/hqdefault.jpg)
How to Make FAT Techno Stab (free rack) [Ableton Techno Tutorial]
new video with a new rack that's allowed you to create great technosense stuff
7 chapitres
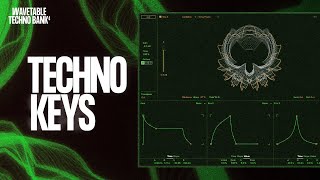
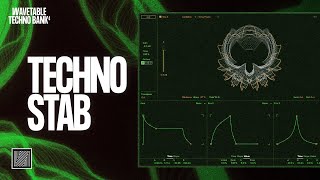
- Introduction and Rack OverviewPrésentationThe tutorial introduces a free lifetime Wavetable rack for creating techno stabs with various presets and variations available for download.Fonctionnalités principales• Tone macro controls wavetable position for edgy and gritty or rounded sounds • FM amount and tune parameters create aggressive character • Release controls sound length from very short to horn or sustain effects • High pass filter acts as a band pass filter with delay integrationContrôles supplémentaires• Stereo control uses Unison to manage signal width across the spectrum • Julian Reverb restores stereo width when needed • Classic ping pong delay for spatial effects • Delay and Reverb can be bypassed for custom processingRésultat sonoreThe rack produces fat, aggressive techno stabs with customizable tonal characteristics and spatial processing.
- Building the Rack from Scratch - Oscillator SetupInitialisationStart with Wavetable in mono mode with FM synthesis style selected, mapping FM amount and tune macros.Sélection de l'onde• Choose from Retro wavetables like Sweep 1 or Sweep 2 • Brown noise option available for texture • Map wavetable position to the Tone macro for tonal variationEnvelope d'amplitude• Set zero attack for immediate full volume on note trigger • Keep sustain at maximum for continuous sound • Set decay around 200 milliseconds to avoid harshness • Adjust release based on desired transient sharpnessHarmoniquesAdd a unison with Shimmer using two voices and 20 amount to create stereo width without unwanted detuning effects.
- Filter Processing and Transient DesignFiltre principal• Use low pass filter set around 60-80 Hertz with Moog Prodigy filter style • Modulate filter frequency with Envelope 2 using matrix at around 75 amount • Set envelope to zero attack with reduced sustain for aggressive opening • Apply decay around 375 milliseconds with slope adjustment for tighter responseColoration du filtre• Crank up resonance to accentuate filter movement without acid resonance effect • Add drive to beef up the sound and add bite • Adjust volume to around -18 to maintain proper levelTransient et clic• Use Envelope 3 modulated to pitch at 36 semitones for click generation • Set very sharp envelope around 15 milliseconds • Creates aggressive transient and adds definition to the stabRéglage finalThe combination of filter modulation and pitch envelope creates an edgy, aggressive stab with pronounced attack and transient characteristics.
- Macro Mapping and Additional FilteringMacro Release• Map Envelope 2 sustain to the Release macro • Controls overall sound length from short stabs to longer sustains • Easier to understand than technical sustain terminologyFiltre passe-haut• Add second high pass filter mapped to HighPass filter macro • Set frequency around 500 Hertz to cut fundamental frequencies • Adjust resonance to 45 for character without extreme filtering • Toggle on/off functionality at minimum macro positionModulation d'enveloppeOptionally modulate high pass filter with envelope for dynamic band pass effect and additional tonal movement.Largeur stéréo• Use Utility device to control stereo width via matrix • Set range from 30 to around 50 for balanced stereo without excessive width • Prevents overly mono or excessively stereo signal
- Saturation and Distortion EffectsOverdrive initial• Add subtle overdrive across entire spectrum with drive around 30 • Increase tone around 60 for mid-high distortion • Reduce Dynamics slider for controlled effect • Keeps effect subtle while adding aggressionSaturation lisse• Use Saturator with medium curve for loudness enhancement • Reduce effect amount to 60 for subtle character • Adds bite and cohesion without overwhelming presenceÉgalisation multibande• Apply Multiband Dynamic in EQ mode, not compression mode • Set low band at 217 Hertz, high band at 1 kilohertz • Reduce high and mid output to rebalance signal • Leave compression untouched for rebalancing effectRésultat sonoreCombined saturation creates a fatter, more aggressive sound with enhanced harmonics and controlled dynamics.
- EQ and Secondary SaturationÉgalisation graphique• Add low shelf resonance boost to locket frequencies • Boost 1 kilohertz by at least 7 dB • Boost 3 kilohertz by around 3 dB for gentler presence • Apply shape from 5 kilohertz with 2-3 dB gainCompensation de gainReduce overall output by minus 5 dB to compensate for EQ boost and maintain proper headroom.Resaturation• Use Saturator with soft sign curve for additional color • Reduce output to maintain space for subsequent effects • Adds final layer of loudness and warmthDétail transient• Apply Rejects on small amount to add click and transient • Reduce dry/wet amount to around 30-40 to avoid excessive resonance • Small detail that significantly improves clarity and bite
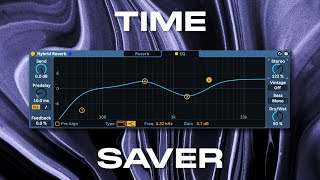
- Delay, Reverb and Final Loudness ProcessingTraitement spatial• Add classic Ableton ping pong delay with 1/3 note timing • Filter delay signal slightly to reduce harshness • Reduce feedback to prevent overly long tail • Apply dry/wet to rack for subtle spatial effectReverb convolution• Use Hybrid Reverb with convolution impulse • Select room preset like Noera Copies Room • Reduce decay time to prevent excessive tail length • Map dry/wet to reverb macro for controlTraitement final de loudness• Use Ableton Jumpers in full mode for harmonic enhancement • Activate compressor in Savage mode for aggressive loudness • Reduce damping to control excessive high-frequency addition • Apply EQ to remove harsh frequencies introduced by crunchContrôle de la queue• Apply negative Transient control to reduce reverb tail length • Prevents mix muddiness while maintaining large room feeling • Finalize with base mono utility for cohesive low end