This Drum Rack Method Saves HOURS of Work
4 capitulos
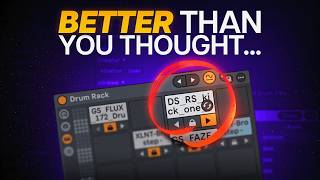
- Introduction to Drum Rack PotentialProblem StatementMost live users don't utilize Drum Rack's full potential and only use it as a basic drag-and-drop sample player.Key Benefits• Eliminate messy drum groups while maintaining mixing and effect options • Build custom kits to prevent endless sample library browsing • Use drum synthesizers exactly like regular samplesWhat's CoveredThe video demonstrates creative and streamlined ways to fill all Drum Rack paths.OverviewFirst technique is the infinite drum kit trick using sampler with 128 sounds mapped to a knob.
- Using Plugins as Drum SoundsPlugin SetupDrag a plugin like Exo onto a pad and use mapping magic to combine stock drum rack behavior with plugin features.Initial Configuration• Drag the plugin into an empty pad in drum rack • Add an External Instrument device to the desired pad • Go to MIDI 2 and select drum rack in the chainMIDI ConfigurationExpand chains and access in/out settings to configure MIDI options. Ensure the drum kick pad receives and plays the correct MIDI note (C1 for Exo), checking each plugin's note mapping.ReplicationCopy the drum pad and repeat for all desired sounds, matching receive and play positions to corresponding notes (D1, D#1, etc.).
- Routing and Output ConfigurationInitial IssueEach pad plays its own sound from the plugin, but without routing, there's no way to group, mix, or add effects outside the plugin itself.Auto Route SetupIn the plugin's edit tab, find the hidden menu and select 'auto route all outputs' going from lane 1-8 to bus 1-8.Bus AssignmentAssign each drum sound to its corresponding bus: kick to bus 1, tom to bus 2, snare to bus 3, clap to bus 4, and so on.End ResultThe setup now functions like using samples, where each pad plays only its assigned sound, allowing mixing directly in Live and adding effects to individual sounds.
- Chains and Effect ProcessingChain OrganizationCreate return chains for different purposes: kick and snare group, hi-hat group, perks group, parallel processing, and reverb.Routing Methods• Route audio through in/out section using the audio menu to assign to corresponding chains • Use send and return sliders to apply effects and parallel processingMacro MappingMap volume control of each bus to separate macros for quick adjustments. Also map hi-hat brightness controls and dry/wet knobs for parallel compression and reverb.Sidechain CapabilityBy grouping kick and snare together, you can clip them and use the group as a sidechain signal source for the entire session.