Learn These 33 Tips If You Are a Music Producer in 2022
32 chapters
- Kick and Sub Bass Frequency FundamentalsFrequency Ranges• Sub bass should be below 65 Hz • Below 20 Hz is inaudible to humans • Between 20-35 Hz most systems struggle to reproduce • 55-65 Hz is the transition zone from bass to sub bassSweet SpotThe optimal frequency range for kick and sub bass is 35-55 Hz, which corresponds to the musical notes E, F, G, and A.Sound Design TechniqueAlter the same patch by changing envelopes and adjusting filter settings to create variation, resulting in smoother and noisier sounds that add groove.Practical ApplicationLayering multiple versions of the same patch with different envelope and filter characteristics creates a cohesive, groovy low end.
- Low End Separation and Loudness ControlDefinitionLow end separation creates a loudness difference between the very low end (below 150 Hz) and the mid-low range (150-400 Hz).Effect• Emphasizes the bottom of your track • Pushes back the mid-low frequencies • Maintains overall loudness while redistributing itPerceptionBy boosting the low end and decreasing mid-low loudness, listeners perceive more bass than actually exists.Best PracticeUse separate bass sounds rather than tuning kicks to serve as bass lines. Reserve kicks for punch and kicks, using dedicated sub bass or synthesizers for bass frequencies.
- Kick Tuning and Length SelectionTuning Approach• Don't blindly tune every kick to the root key • Experiment with the first, third, and fifth intervals • Try different color schemes for variationGenre Considerations• Hard style and heavy techno: longer kick length • Tech house and progressive: medium kick length • Harder styles: shorter kick lengthPurposeKicks serve as transients and punch, not as bass lines. Understanding the genre determines the optimal kick characteristics.DefinitionA kick drum is a percussive element that provides punch and transient, separate from the bass line itself.
- Drop Structure and Energy BuildingBuild UpStart with a high-energy break and build section, gradually increasing loudness while remaining tilted to the high end.Delay Drop Technique• Create fine mata (tension) before the drop • Drop energy level unexpectedly • Often followed by a teller sound • Play short lead sounds to hint at the drop's characterColor ShiftAfter the delay, shift the track into red focus, moving from high end to mid-range with tighter, more controlled sounds.Peak TimingThe most energetic part of the drop occurs later than the original anticipated drop point, creating surprise and maintaining engagement.
- Prefix Resampling and Stereo EnhancementResampling MethodCreate a tail from an original sound, reverse it, and place it in front of the original sample to create an epic and drastic ambience.Utility AutomationAutomate the beat to move from super stereo to center just before a note hits, creating dynamic spatial movement.Combined EffectLayering the reversed sample with the original creates a distinctive textural quality that enhances the overall sound design.Filter CaptureCapture synthesizer filter behavior by examining oscillators, removing filters and effects to understand the underlying pitch drift and modulation.
- Synthesizer Design with Wave Tables and UnisonWave Table SetupUse wave tables as the primary oscillator source and analyze pitch drift by examining the fundamental oscillator.Unison Technique• Apply unison to create harmonic richness • Space oscillators one octave apart • Layer multiple wave table instancesFilter MovementAdd subtle filter movement and envelope modulation to create dynamic, evolving textures that sound organic and natural.Final LayeringCombine the unison wave tables with filter modulation and additional effects to achieve lush, juicy, and modern sounds.
- Panning and Spatial DistributionStereo PanningDistribute sounds to the right side by boosting one channel rather than simply moving them hard-right for a more natural effect.Balance TechniqueTake a small amount from the left side to gain-compensate the overall sound, maintaining natural balance.ApplicationUse this technique for elements like shakers to create distributed, spacious stereo imagery without harsh panning.GoalAchieve a more subtle and professional stereo field by distributing rather than hard-panning sounds.
- Snare Drum Crafting and TextureNatural MovementRecreate the friction sound of a drum stick rolling on a snare by layering the initial hit with friction sounds that follow.Attack Control• Decrease attack to reduce the initial hit • Create multiple hit layers • Soften the attack for smoother transitionsEcho TechniqueApply very fast delay (around 34 milliseconds) with short feedback to create a fast echo that sits naturally in the snare.Vocoder EffectUse a vocoder to make the sound more frictionless and organic, reducing harshness while maintaining character.
- Organic Drum Patterns and QuantizationLoose Drum StyleArtists like Burial created loose, organic drum patterns by using Sound Forge (not a DAW) for sample editing, avoiding traditional quantization.Ableton Recreation• Deactivate fixed grid quantization • Use Ctrl+U to manually move notes around • Apply grooves afterwards for organic feelSound Forge ToolSound Forge is primarily a sample editing tool, not a full DAW, which naturally prevents rigid quantization and creates looser rhythms.Pattern ResultThe lack of quantization creates loose, garage-like and jungle-influenced drum patterns that sound more human and less robotic.
- Polyrhythms and PolymetersPolyrhythm Definition• Two rhythms play simultaneously with the same length • Different divisions create different rhythmic feels • Example: three hits on top, two hits on bottomPolymeter Definition• Same rhythm with same divisions but different lengths • Rhythms sync at regular intervals • Example: one bar loop with four hits vs one and a half bar loop with six hitsKey DifferencePolyrhythms have different divisions with same length, while polymeters have same divisions with different lengths.Common MistakeMany amateur producers compress everything without understanding compression's effect, resulting in lost dynamic impact.
- Compression and Dynamic ProcessingCompression PurposeCompression reduces loudness when signal exceeds a threshold, altering the shape of attack and decay envelopes.Parallel Compression• Use extreme compression settings on a parallel track • Blend with original signal for bulky, fat sound • Maintain initial attack spike while gaining volume controlUsage WarningDon't use compression everywhere in a master track unless you fully understand its effects on your sound.Practical ApplicationVary compression settings and amounts on individual hits to create dynamic, evolving character while maintaining punch.
- Sound Design with Layering and EffectsFM ModulationUse FM synthesis with envelope modulation on the filter cutoff to create aggressive, resonant, and dynamic sounds.Filter Management• Apply extreme distortion on the primary filter • Add a secondary filter to remove super-high frequencies • Balance harshness with careful EQEnvelope ShapingCreate two aggressive envelopes: one for amplitude and one for filter cutoff to achieve rich, evolving textures.Sound ResultCombining FM modulation, dual filters, and aggressive envelopes produces distinctive, punchy, and characterized sounds.
- Frequency Behavior and Spatial PerceptionSound Propagation• High frequencies lose energy in air faster than low frequencies • Low frequencies travel longer distances • Reflections from surroundings affect perceived soundSpatial Cues• Low-pass filtering creates the illusion of sound from underground or far away • High-frequency emphasis suggests sounds from above • Solid materials block high frequencies more than low frequenciesPsychological EffectOur ears interpret frequency characteristics as spatial information, allowing sound design to create convincing environmental positioning.Design ApplicationUse filtering and effects to create atmospheric risers and sounds that appear to come from specific spatial locations.
- Creative Riser Design and DistortionSound CreationStart with a percussive sound like an engine start and layer it with vocoder, delay, and frequency cutting for ambience.Effects Chain• Add vocoder for texture • Apply delay for spatial depth • Cut low frequencies for perceived height • Automate gain and pan for movementDistortion Technique• Use distortion plugins like Trash to add aggression • Apply EQ to manage harsh frequencies • Layer multiple distorted elementsModern ApproachMove beyond classic cheese risers by creating authentic, dynamic effects using creative sound design rather than presets.
- Bass Layering and Sub BalanceSub Bass LayerCreate a dedicated sub bass by boosting the F fundamental note and layering it with additional sub frequencies for depth.Multiple Layers• Pick random samples and loop layers • Turn down high-frequency content • Focus on super-low frequencies below 100 HzSidechain IntegrationAutomate sidechain compression to create dynamic contrast between the kick and sub bass, enhancing the groove.Air and PresenceLayer high-frequency noise samples on top to add air and perceived size to the bass, making it feel bigger without adding low-end mass.
- Vintage Vocal Chopping and Pitch EnvelopesOld-School TechniqueSample vocals and place them in a sampler to process with pitch envelope modulation for vintage vinyl-stop effects.Pitch Envelope Setup• Activate pitch envelope with high amounts • Add attack for pronounced initial sound • Create downward pitch sweep with decay • Reduce sustain for quick transitionsSound Character• Adjust curve style for darkness variations • Add release time for smooth tail • Layer multiple pitch-enveloped vocalsVinyl EffectPitch envelope modulation recreates the vinyl stop effect where pitch drops as if a record is slowing down.
- Multi-Layer Vocal ProcessingLayering MethodDuplicate the processed vocal three times, each with different pitch envelope curves to create richness and complexity.Curve Variation• Create brighter versions with softer curves • Make darker versions with steeper curves • Vary the pitch envelope amounts across layersHarmonics ImpactMultiple vocal layers with different pitch envelopes create rich harmonic content that sounds more authentic than a single layer.ResultLayered vocal processing with varied pitch envelopes produces lush, expensive-sounding textures suitable for modern production.
- Minimalist Synthesizer Design and EffectsMinimal ApproachUse a simple single-oscillator synthesizer like Fabulus One without complex layering for clean, focused sounds.Stereo Through Filtering• Create stereo width using the Timeless Five-filter plugin • Add chorus or chorus-like effects • Maintain tight control of frequency responseSub Management• Keep super lows below 56 Hz in mono • Everything below 64 Hz should remain mono • Allow rest of spectrum to be stereoSound CharacterMinimalist synthesizer design with strategic stereo treatment and subtractive filtering creates sophisticated, modern sounds.
- House Music Anthem History and ImpactTrack BackgroundHouse Music Anthem by Marshall Jefferson was initially rejected by Trax Records owner Larry Sherman who didn't consider it true house music.Release Story• Marshall Jefferson added the anthem to the title • British journalists visited Chicago clubs • The track was playing everywhere in the clubs • Crowd reaction forced the label to release itCultural ImpactThe track became iconic and was sampled by 71 different songs, demonstrating how crowd response can change a song's trajectory.Key LessonA track's success and legacy can be determined by crowd reaction and community support rather than initial label approval.
- Ambient Sound Design and ReverbWeird AmbienceCreate unusual atmospheric textures by emphasizing resonance and pushing sound through distortion and amplification.Effects Chain• Use amp distortion plugin • Apply extreme distortion settings • Add ping-pong delay for spatial effect • Layer with massive reverbSound CharacterThe combination of distortion, amp modeling, and ping-pong delay creates expansive, unusual ambient textures.PurposeAmbient sound design techniques add depth, space, and otherworldly qualities to electronic music productions.
- Parallel Drum Compression TechniqueRegular CompressionStandard compression reduces volume above threshold and alters the shape of attack and decay envelopes.Parallel Method• Use extreme compression settings on a parallel track • Maintain fast, extreme settings • Sum original and compressed signals togetherEffect Result• Initial super-spike attack remains audible • Compressed signal adds bulk and fatness • Combined signal sounds significantly thickerDrum ApplicationParallel drum compression creates thick, punchy drums with maintained transients while adding perceived weight and impact.
- Back Melody and Arrangement EnhancementBack Melody PurposeUse back melody elements to enhance ambience without adding complex contours or overcomplicating the main arrangement.Design Philosophy• Focus on enhancing ambience • Avoid unnecessary contour complexity • Support the main arrangementBackground SoundLayer additional background sounds to enhance the beginning of drops and rhythmic sections for added depth.Subtle ApplicationUse less dramatic effects compared to other arrangement elements, keeping back melody understated and supportive.
- Return Channels and Parallel ProcessingRoom Reverb Send• Create a dedicated room reverb return with 2.5-second decay • Remove low end from reverb • Apply sidechain compression • Send drums to the reverbDrum Processing Chain• Use additional send for distortion and compression • Apply tube warmer distortion • Compress the distorted signal • This creates parallel compression effectCohesion BenefitUsing return channels creates cohesive glue across drums rather than applying individual reverbs to each channel.Loudness ImpactParallel processing and return sends significantly improve track loudness competitiveness by adding controlled aggression and thickness.
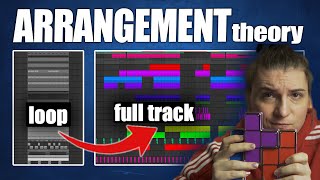
- Micro and Macro Arrangement ConceptsMicro ArrangementShuffle the track using 4-16 bar loops to create concrete ideas and story progression without worrying about transitions or effects.Macro Arrangement• Focuses on transitions and automations • Not important until happy with main idea • Shouldn't spend time on effects earlyTop-Down Approach• Create a chorus with all possible elements • Copy this loop throughout the track • Delete elements that don't belong in each sectionBottom-Up AlternativeStart minimal and gradually build elements up, creating arrangement through addition rather than subtraction.
- Master Channel EQ and AutomationChannel EQ SetupPlace a channel EQ on the master with automated low and high-frequency adjustments for dynamic frequency shaping.Frequency Automation• Gradually shell out lows by minus 3 to minus 6 dB • Automate high-end cutting or boosting • Create dynamic tonal movementWhite Noise LayerAdd white noise with reverb on the master to serve as a reference for frequency movement and atmosphere.Balancing EffectMaster channel EQ automation balances other cut-off automations in individual sounds, creating cohesive frequency movement.
- Room Acoustics and Low-End MixingRoom Mode Problem• Untreated rooms have room modes that color frequency response • What you hear while sitting isn't accurate • Common issue: 40 Hz boomed 20 dB louder than 60 HzFrequency Ringing• Some frequencies ring longer than others • Creates uneven reverb decay across spectrum • Example: 40 Hz sustains while others decay quicklyMixing SolutionDon't trust your ear when mixing low end. Account for room modes and use reference monitors or measurement tools.EQ DemonstrationCreate reference EQ curves to demonstrate and compensate for room coloration during low-end mixing decisions.
- Overtones and Harmonic RelationshipsOvertone Basics• Overtones are harmonics above the fundamental • Undertones are below the fundamental • They define the timbre of instrumentsHarmonic Series• Overtones occur at integer multiples (100, 200, 300 Hz) • Lower octaves have tighter harmonies • Higher octaves have wider harmonic spacingOctave EffectPlacing the same pitch one octave higher doubles the harmonic frequencies, creating different harmonic density and perceived richness.Harmonic RichnessLower pitch sounds have tighter harmonic relationships that create richer, more complex timbres compared to higher pitches.
- Stereo Field and Frequency DistributionStereo Triangle• Center should be completely mono • Gradually introduce stereo enhancement • Low frequencies should remain mostly monoFrequency Positioning• Kick should be centered and mono • Synths can be slightly stereo • Effects should be more stereoBleeding EffectsWhen synths and effects bleed into low-frequency space, reduce their stereo width to maintain clean mono bass.Appreciation PrincipleMaintain mono control in certain sections to make stereo sections more impactful and appreciable when they appear.
- Arpeggio Patterns and Note RelationshipsArpeggio Structure• Ceiling note is the highest note • Floor note is the lowest note • Central note is where others gravitate towardFocus DirectionIdentify whether the arpeggio emphasizes upper or lower focus in the first and second halves of the pattern.Shout and Fall Pattern• Named from literature, not original terminology • Oscillates between ceiling and floor notes • Creates distinctive arpeggio characterSound ResultUnderstanding arpeggio structure and focus patterns allows intentional creation of melodic character and emotional arc.
- Analog Soundscaping with Filter NoiseFilter InstabilityActivate noise sources and modulate the filter to create filter noise, which adds organic, unstable character.Noise Modulation• Use noise as a modulation source for filter cutoff • Increase modulation amount carefully • Creates natural-sounding instabilityAnalog EffectFilter noise modulation recreates the analog character of vintage synthesizers that had inherent instability.Sound QualityThis technique makes digital synthesis sound more analog and organic compared to perfectly stable digital oscillators.
- Plucky Bass vs Sustained Sub EndPerception Challenge• Higher frequencies are easier to hear than low frequencies • Fletcher-Munson curve shows humans favor mid-range • Sub bass requires sustained envelopes to be feltFletcher-Munson CurveHumans perceive mid-range frequencies more easily and sensitively compared to low frequencies at the same loudness level.Layering Solution• Create plucky high-pitched bass sound • Layer with sustained sub-end on lower frequencies • Brain focuses on higher pitch while sub provides foundationEnvelope SeparationSeparate filter envelope from volume envelope: short filter attack for plucky character while maintaining volume sustain for depth.
- Warping and Time-Stretching TechniquesOld-School SustainCreate sustained sounds in old jungle by duplicating samples and using re-pitch mode with doubled tempo.Re-Pitch Doubling• Duplicate the same sound three times • Set each to re-pitch mode • Double the tempo on each layer • Add effects and layer togetherSound WarningRe-pitch doubling can sound too much like Warcraft if not managed carefully. Use subtle settings and additional effects.Jungle CharacterMultiple re-pitched and time-stretched samples create the characteristic loose, organic sustain sound of old-school jungle productions.