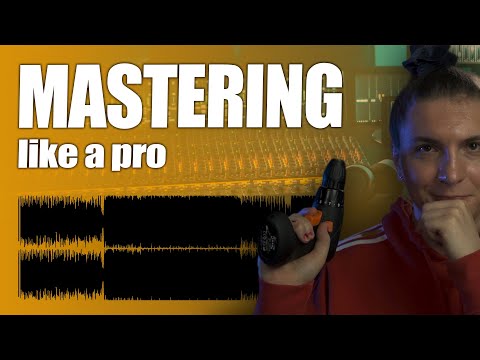
How to master - mastering like a pro
9 chapitres
- Introduction and Track OverviewVideo GoalMastering a track in real time to demonstrate the transformation from pre-master to final master version.Track Details• Track is from Baeda • Set to release on Mercurial Tones on Friday • Features space-themed vocals and atmospheric soundscapeReference ApproachUsing a reference track with similar frequency response and soundscape to guide the mastering process.Key InsightThe reference track shows minimal frequency variation, indicating minimal EQ correction will be needed.
- Frequency Analysis and Colorization SetupTarget CreationExtract a small consolidated piece from the reference track, disable warp algorithms, and create a target using Tonal Balance to visualize frequency response.EQ DecisionSimilar frequency response to reference track means minimal EQ correction needed, allowing focus on colorization instead.Tape Saturation• Apply subtle tape saturation using modern master tape preset • Adds slight dirty tape sound without over-coloring the client's work • Use phase flip technique to isolate and hear the exact effectQuality CheckMonitor clipping to ensure distortion is kept at acceptable levels around the sweet spot on the input gain.
- Peak Limiting and Initial CompressionTransient ControlUse FiveFilter Pro to identify and clip unexpected transient spikes, catching peaks around 0.5 dB to prevent issues during later compression and limiting stages.Limiter Settings• Algorithm: Transparent (minimal sound coloration) • Match output level to input level after clipping • Adjust aggressiveness based on different track sectionsSmooth PreparationApply LA2A compressor to smooth overall transients before multiband compression, creating a gentle pumping feel that prepares the track for further processing.Observable ChangesLow end gets tucked down slightly as the LA2A compressor naturally grabs lower frequencies first.
- Multiband EQ and Balance RefinementFrequency BalancingUse FiveFilter Pro to balance low, mid, and high frequency ranges, creating smoother transitions between frequency extremes.Kick Frequency AdjustmentRemove excessive pump sound around 300-400 Hz in the kick using corrective EQ, making small surgical cuts rather than drastic changes.A/B Testing MethodContinuously toggle adjustments on and off to verify each change improves the sound rather than assuming improvements based on placebo effect.Subtle EnhancementAll adjustments are incremental refinements rather than drastic corrections, building toward the final polished result.
- iZotope Ozone Analysis and ProcessingDistortion and Tools• Apply distortion for organic enhancement • Use stereo imager to widen the mix • Use limiters for additional color beyond FiveFilter ProReference LoadingLoad full reference track into Ozone's Master Rebalance for analysis; this produces better results than using small sections.Selective Settings• Disable dynamic EQ suggestions that oversqueeze synth sounds • Remove excessive low-end adjustments that feel too extreme • Keep subtle EQ boost in mids that complements the trackMaximizer SelectionChoose the sturdier maximizer algorithm to catch more transients and provide stronger limiting without over-processing.
- Advanced Color Processing and EnhancementExciter and Distortion• Exciter: Add brightness to super high frequencies for enhanced clarity • Analog distortion: Smooth low end and bring it forward • Retro distortion: Add bright, shimmery high-end complementMultiband Distortion SetupCreate four frequency bands: clean up to 500-600 Hz, analog distortion for low-mids, retro distortion for highs, analog in middle frequencies.Stereo Imaging Strategy• Low end (200 Hz): Keep mostly mono despite synth bleed • Low-mids: Tighten up slightly to prevent muddiness • High frequencies: Allow wider stereo field for spaciousnessIntegrationAll processing layers work together to open up the mix, with exciter adding harmonics and imager creating proper stereo balance.
- Metering and Final EQ RefinementMaximizer MonitoringCheck maximizer regularly to ensure the track isn't being over-processed and that deviation remains controlled across different sections.Pultec EQ Technique• Boost low end and simultaneously cut mid frequencies using Pultec EQ • This curve separation creates cleaner low-end separation without traditional boost • Complements the earlier LA2A compression which had cut low-end initiallyHigh-End SeparationFine-tune high-end frequencies to achieve optimal fit between track and reference without exaggeration.Low-End CompensationSlightly boost U8 region to compensate for the smoothness lost during initial LA2A compression stage.
- AI-Assisted Mastering and Final LimitingAI Tools Application• Spiff: Uses AI to fix subtle resonances and problem frequencies in real-time • Good Ear: AI-powered EQ for final micro-adjustments and fine-tuningLimiter ChainFirst limiter (transparent): Catches initial transients. Second limiter (aggressive): Maintains bass-heavy sound while controlling peaks.Loudness TargetsReference track shows typical techno mastering range of -7.5 to -8.3 LUFS short-term with integrated around -8 LUFS; aim for consistent loudness without excessive distortion.Safety Measures• Set true peak ceiling to -0.1 dB to prevent inter-sample peaks across services • Use oversampling on final limiter for guaranteed safety • Apply high-pass utility filter at the very end to remove tape noise artifacts
- Final Comparison and Mastering PhilosophyBefore and AfterCompare unmastered and mastered versions to hear dynamic behavior changes, frequency response improvements, and overall loudness increase while maintaining clarity.Realistic ExpectationsQuality mastering on already good tracks yields 15-20% improvement maximum; drastic improvements indicate major mixing flaws in source material.Decision-Making Priority• Decision-making beats plugins: thoughtful choices matter more than tool collection • Ask each step: Do I need distortion? Compression? Frequency correction? Color enhancement? • Incremental improvements throughout the chain compound into final polished resultResource SharingMastering chain and plugin settings shared for reference; viewers must adapt based on available tools while maintaining the logical processing order and decision-making approach.