
My Vocals Sucked Until I Used This TOOL 🤯
12 capitulos
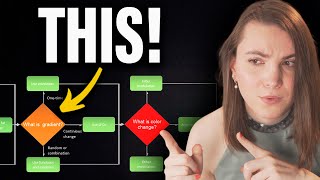
- Introduction and Vocal PreparationProblem OverviewThe difference between poorly processed and professionally processed vocals comes down to a single vocal processing chart that took years to master.Tool IntroductionAlice uses a flowchart-based approach to vocal processing that guides producers through each step of the vocal chain.Demo Setup• Using a vocal sample from Loopman with intentional imperfections to demonstrate real-world processing • Audioio M introduced as alternative for generating professional vocals from amateur recordingsStarting PointThe raw vocal has timing issues and other problems that need correction before processing begins.
- Vocal Comping and Timing CorrectionComping ProcessComplete vocal comping allows selection of the best parts from multiple takes, though in this case a single take is used.Placement AdjustmentKeeping vocals slightly off the grid creates a more human feel, while problematic early entries are identified for correction.Timing Fix MethodUsing markers to identify transient starts and empty spaces, then manually adjusting timing by dragging sections to the correct position.Quantization NoteFull quantization is not recommended as it removes the natural feel from vocals.
- Vocal Restoration and CleaningBackground NoiseThe demo vocal is relatively clean, but AI noise removers or tools like iZotope RX are recommended for noisy recordings.Rumble and Sizzle• Remove low-frequency rumble that adds nothing to the vocal • Identify and eliminate harsh high-frequency sounds that get amplified through the processing chainMouth NoisesUse tools like Pro-Duck to automatically suppress breath sounds, pops, and sibilance through ducking when these elements occur.De-esser ApplicationDe-essers like Pro-DS or Soothe reduce harsh sibilant sounds, with Soothe offering an alternative that also addresses resonances.
- Advanced Cleaning ToolsTransient ControlSpiff provides transient shaping to focus on unwanted sounds while still allowing automation for selective processing.Sibilant ManagementDe-essers reduce harsh S sounds that become irritating in processed vocals, with adjustment needed to avoid over-processing.Noise Gate• Noise gates close down volume in parts with no vocal content • Manual trimming is preferred over gates to avoid phasing issues with the vocal attackResultOnce restoration is complete, the vocal is ready for pitch correction and dynamic processing.
- Pitch Correction with Auto-TuneKey IdentificationIdentify the song's key before pitch correction; in this case the vocal is in B-flat minor.Pitch Error AssessmentListen to the original vocal to determine how much pitch correction is needed; the demo vocal is veering flat in places.Auto-Tune Method• Start with automatic correction mode for quick processing • Use manual graph mode for fine-grained pitch adjustment and drawing custom pitch curvesCorrection SettingsAdjust vibrato and pitch movement to control how natural or processed the vocal sounds, from contained artificiality to natural movement.
- Corrective EQ and ResonancePurposeCorrective EQ removes unwanted resonances before applying dynamic control, fixing existing character issues in the vocal.Boxy Sound FixUse broader EQ cuts to remove room reflections that create a boxy tone, while adding air in the high frequencies.ApproachMake room corrections with gentler curves rather than aggressive cuts to preserve vocal character while fixing problems.BalanceRebalance the overall tone only if needed; avoid over-processing when the vocal already has good character.
- Dynamic Control and Vocal RidingCommon MistakeProducers often search for a single magical compressor to solve problems, but compression always depends on the specific vocal.Volume ConsistencyBefore applying compression, manually ride the vocal volume to bring loud parts down and quiet parts up for even consistency.Compression Chain• Apply smooth compression first to handle moderate dynamics • Add a maximizer afterward for additional peak control with musical colorationResultThis two-stage approach creates professional vocal presence common in dance music production.
- Coloring and SaturationFour-Band MethodUse a four-band EQ with saturation to color the vocal: very low, low-mid, super mid-high, and really high frequencies.Reference Matching• Compare to a professional reference track with matched loudness • Match saturation levels to add warmth and character to the vocalSaturation TypesOptions include warm tape saturation for smooth coloring and gentle saturation for subtle enhancement without excessive distortion.Air AdditionAdd presence in the high frequencies to give the vocal clarity and brightness matching the reference vocal.
- Ambient Effects SetupReverb FoundationUse a short plate or room reverb at low wetness to place the vocal in a space without overwhelming it.Reverb DuckingSide-chain the reverb from the vocal signal to reduce reverb when the vocal is present, preventing wash-out while maintaining spaciousness.Shimmer Layer• Shimmer reverb takes the vocal up one octave and adds reverb focusing on high frequencies • Increase diffusion and cut low frequencies for a bright, spacious effectAdditional EffectsOptional gentle overdrive on reverbs for aggression, and slight distortion on main vocals for genre-specific character.
- Delay and Parallel ProcessingSlap DelayUse fast slap delay in parallel to create quick echoes that hit right after the vocal entry, compressed to blend smoothly.Long ReflectionsAdd longer reverb or simple echo to provide room reflections and depth without the vocal getting lost.Echo SettingsUse simple echo for easy translation across different DAWs, with cut low frequencies and reduced feedback to maintain clarity.IntegrationAll effects are adjusted based on how they work with the backing vocals and overall mix space available.
- Backing Vocals and AI GenerationProblem SolutionSample-based vocals lack harmonies and backing vocals, solved using AI vocal generation to create additional vocal layers.Voice SelectionChoose different singers from available options to create varied backing vocals; female vocals like Josephine pair well with the lead.Multiple Takes• Generate backing vocals with different singers to create depth and richness • Pan left and right at nearly 100% to create a wide, ambient backing vocal bedProcessingGroup backing vocals together and apply collective EQ to cut low frequencies, ensuring they complement rather than compete with the lead vocal.
- Final Touches and HarmoniesHarmony DecisionAdding harmonies depends on the vocal richness; overly rich vocals with many layers risk sounding cluttered.Vocal DensityConsider the existing texture of the lead and backing vocals before deciding to add more harmonic layers.Mix IntegrationAll added elements must complement and support the main vocal rather than compete for space.Final ResultThe completed vocal processing chain transforms raw vocals into a professional, polished lead vocal with supporting textures.