FL Studio 20 Basics - The Channel Rack (Step Sequencer)
7 capitulos
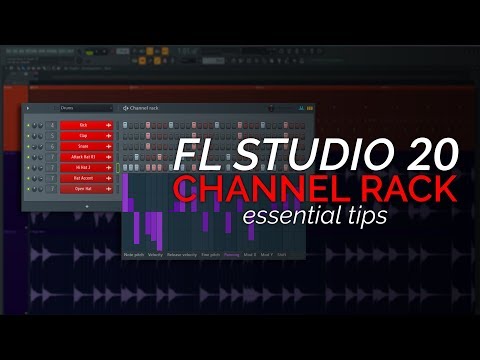
- Step Sequencer Fundamentals and Beat ProgrammingStep Interaction• Left click to select and activate a step • Right click to delete a step • Left click and drag to select multiple steps • Right click and drag to delete multiple stepsPattern CreationCreate a basic drum beat by adding steps for kick, clap, and snare samples across different channels to form the groove.Quick Fill OptionsRight click on a channel to access options menu and use fill each option to quickly populate steps at regular intervals instead of manually adding each one.Channel Features• Mute and solo buttons to isolate channels • Channel panning to move sound left or right • Channel volume to adjust loudness • Play button to hear the pattern
- Piano Roll and Graph Editor Editing ModesPiano Roll View• Click the piano roll button to switch from step sequencer view • Left click on a sample to open detailed piano roll editor • Move samples to any position and adjust pitch freely • Add samples at different pitches directly in the editorGraph Editor AccessThe graph editor provides detailed control over note properties beyond the step sequencer interface.Editable Parameters• Note pitch: adjust the pitch of each sample • Velocity: control how soft or loud notes play • Fine pitch: make subtle pitch adjustments • Panning: position each note in the stereo field • Time shift: move notes slightly earlier or laterWorkflow AdvantagesThese editing modes provide much more control than the basic step sequencer, allowing for precise timing adjustments, humanization, and sound design.
- Grouping, Organization, and Channel ManagementGroup Selection• Hold Shift and click or drag to select multiple channels • A green box shows the currently selected channel • Selected groups can be managed togetherCreating GroupsUse Alt+G shortcut or channel options menu to group selected channels together and assign a group name like 'drums' for organization.Visual Styling• Select first gradient color for the group • Select second gradient color • Channels will be colored as a gradient between the two colors • Access through channel options right-click menuSpace Management• Groups can be zipped to save space in large projects • Click zipped groups to reveal their contents • Right-click to unzip and expand • Essential for projects with 80-90 channels
- Advanced Humanization and Swing EffectsVelocity AdjustmentsUse the graph editor velocity parameter to adjust volume for individual notes, such as reducing every second hi-hat note to create a natural pattern.Stereo PanningUse the panning parameter in the graph editor to move notes around the stereo field, adding width and interest to drum patterns.Swing Function• Swing adds rhythm and groove to steps • Without swing, all steps play perfectly in time • With swing, second and third steps are pushed slightly out of time • Creates a natural, human feel to programmed beatsTiming CorrectionsUse the time shift parameter in the graph editor to adjust the exact timing of notes, fixing timing issues like early or late hi-hat accents.
- Channel Properties, Docking, and Copying PatternsChannel Pan and Volume IndependenceChannel panning and volume controls are independent from graph editor settings; adjustments stack together rather than replacing each other.Window Configuration• Keep channel rack detached to prevent it from disappearing • Adjust channel button width for readability • Set auto-resize to maximum height for most screen space • Set auto-resize to minimum height for compact display • Dock to mixer, playlist, or browser for organized layoutPattern Management• Right-click a channel to access additional options • Copy pattern from one channel and paste to another • Useful for layering similar samples with identical patterns • Saves time when programming variations of the same rhythmChannel Customization• Rename channels for project organization • Change channel colors for visual identification • Add icons to channels for quick recognition • Swap sample while preserving pattern information
- Pattern Rotation and Sample Replacement TechniquesPattern RotationWhen step patterns are misaligned with the beat, use rotation to shift them left or right until they align correctly with the desired timing.Practical ExampleWith hi-hat steps that are out of time, rotating them by one position brings them into proper synchronization with the rest of the beat.Sample SwappingDrag a different sample directly onto an existing channel to replace the sound while preserving all MIDI sequencing and pattern information.Workflow Efficiency• Allows experimentation with different drum samples • Maintains carefully programmed patterns • Saves time by avoiding re-programming patterns • Useful for layering or finding the right drum kit fit