FL Studio 20 Basics - The Playlist
10 chapitres
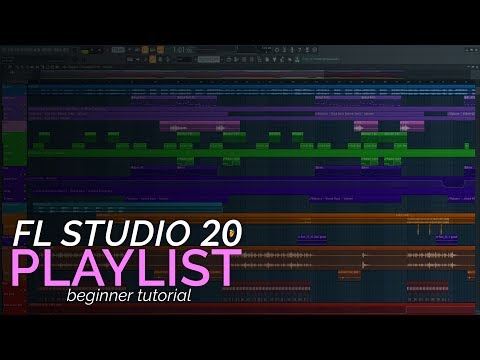
- Introduction and Playlist OverviewVideo PurposeThis video covers how to navigate the playlist, organize it with colors and groups, arrange samples and patterns into songs, customize the playlist, work with audio, and use markers.Playlist FunctionThe playlist is where you arrange patterns created in the channel rack into a complete song, displayed as a grid with time signatures along the top and scroll bars for navigation.Key Components• Time running horizontally from song start (left) to end (right) • Green marker that moves during playback showing current position • Grid divided into bars and steps for precise timing alignmentGetting StartedA project is opened to demonstrate different organization methods within the playlist.
- Essential Playlist ToolsTool Overview• Draw tool (P): Left-click to add clips, right-click to delete • Paint tool: Paint in clips with one click, right-click to delete • Delete tool: Dedicated deletion tool • Mute tool: Mute clips without hearing them • Slice tool (C): Cut MIDI or audio clipsSlice Tool Techniques• Hold Shift while making a selection to lock it vertically for accurate cuts • Hold Alt to make cuts smooth and fluid for precise placement • Select clip edges and drag to restore original length • Right-click with slice tool to delete smaller sectionsKeyboard ShortcutsDraw tool uses P shortcut and slice tool uses C shortcut, enabling fluid workflow when switching between tools frequently.Clip CustomizationRight-click the clip box to access options for renaming, making unique copies, or deleting individual pattern clips.
- Organization and GroupingTrack OrganizationUnlike other DAWs, FL Studio patterns are not locked to specific tracks, so you must manually stay organized by naming and coloring tracks to match your patterns.Naming and Coloring• Right-click a track and select 'Rename color and icon' to name and color it manually • Use the color picker to select colors from the available list • Select 'Auto name' to automatically tie track name and color to the pattern name and colorCreating Groups• Select the pattern underneath and press G or right-click to select 'Group with above track' • Right-click the top track and select 'Auto color group' to color the entire group • Use the collapse arrow to expand or collapse groups for cleaner workspaceGroup ManagementBe careful when deleting clips in groups, as it will delete everything underneath. Collapsing groups reduces visual clutter without removing content.
- Grid and Snap SettingsGrid FunctionVertical lines show the time signature and beat placement, helping align MIDI clips and patterns to the correct timing.Snap Options• Select different snap increments like half beat, quarter beat, or sixth of a beat • Choose 'None' to disable snapping for free placement • Snap settings allow smooth control over pattern clip positioningPlaylist Snap ToggleThe playlist has its own snap to grid option that can follow main FL Studio settings or be changed independently to line, sixth of a beat, half beat, or disabled.Fine-tuningFor MIDI clips, snap them perfectly to the grid. For audio, deselect snapping to position it exactly where needed. Press Alt while dragging to temporarily detach from grid, then release Alt to snap back.
- Customizing the Playlist ViewView OptionsAccess the Playlist Options tab and select View to customize grid color, clip appearance, and background styling.Display Preferences• Grid color can be adjusted for different visual preferences • Clips can display with colored backgrounds or no background • Multiple background style options are available for different work contextsWorkflow OptimizationWhen working with automation, knock out background color to clearly see automation lines. For other work, colored backgrounds help visual organization.ExperimentationTry different view settings to find preferences that work best for your specific workflow and comfort level.
- Copy, Paste, and Clip TypesCopy and Paste• Ctrl+C to copy and Ctrl+V to paste clips • Ctrl+B to paste into the next available slot • Works for pattern clips, automation clips, and audio clipsClip Type FocusThe top display shows focus on pattern clips, automation clips, or audio clips. Focus changes automatically when selecting different clip types.Clip ManipulationAll clip types can be cut, resized, and manipulated similarly to pattern clips using the same tools and techniques.FlexibilityThe playlist allows you to work with multiple clip types seamlessly, adapting tools and functions to whichever clip type is currently selected.
- Working with Audio ClipsAudio SelectionSelect an audio clip and the focus automatically changes to audio clip mode at the top of the interface.Cutting and Resizing• Cut audio clips using the same tools as MIDI clips • Select the end of clips and resize them appropriately • Double-click to select a different mode and choose cross-fading optionsCrossfadingDouble-click on audio clips to access double-click mode and select cross-fading options to smoothly blend cuts and avoid pops or clicks in your song.Stretch WarningIf the stretch option is selected, resizing will change the sample pitch and time. Disable this option if you only want to cut or extend audio naturally.
- Mini Playlist Preview and MarkersPreview DisplayThe top bar shows a colored mini playlist preview that can be toggled on/off or set to double height through Playlist Options > View.Adding MarkersPress Alt+T to add markers in the playlist. Markers are useful for marking the start of verses, choruses, and other important song sections.Marker Functions• Right-click markers to change the time signature for that section • Use markers to loop back to specific song parts • Markers enable punch-in and punch-out recording featuresAdvanced FeaturesMarkers allow you to create dynamic time signature changes within a song, such as switching from 4/4 to 3/4 and back, providing creative flexibility for your arrangements.
- Direct Sample Placement and Final TipsAdding SamplesDrag individual samples directly onto the playlist and treat them like MIDI or audio clips, painting them in however you like without needing to create patterns first.FlexibilityYou are not limited to just MIDI clips or audio loops. Individual samples can be placed and manipulated exactly like other clip types.Organization Strategy• Use colors to visually organize different elements • Keep naming conventions consistent for clarity • Stay organized to avoid confusion and complexitySummaryThe playlist is very flexible. Build songs slowly by arranging and organizing logically. No need to overcomplicate the layout. With consistent use of colors and naming, the playlist will make sense quickly.