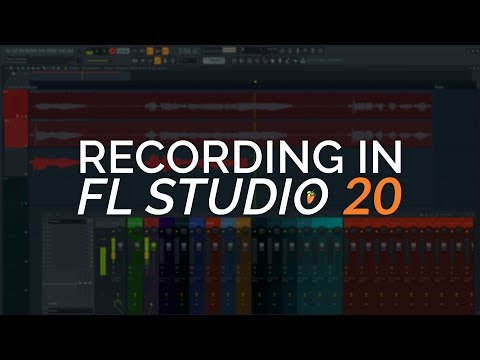
How To Record in FL Studio
9 chapitres
- Introduction and Recording Methods OverviewWhat You'll LearnHow to record audio in FL Studio for vocals, guitars, or any other audio source using two main methods.Recording Methods• Recording straight into the playlist (works 9 times out of 10) • Using the Edison plugin for advanced control over audio recordingsFocus AreaThis tutorial covers playlist recording, the most commonly used method for most users.PrerequisitesFL Studio 20 with a blank or existing template project ready to use.
- Audio Settings ConfigurationAccess SettingsGo to the Options menu at the top and select Audio Settings from the dropdown to open audio device configuration.Device Selection• Select your audio device from the Input and Output section • Choose Azio for all if you don't have an audio interface • Select specific interfaces like Audient or Mackie if availableBuffer ConfigurationSet buffer size between 128 and 256 to balance low latency with stable performance without crackling or distortion.Latency BenefitSmaller buffer sizes reduce latency, which is the delay between speaking and hearing yourself in headphones.
- Mixer Setup and Input ConfigurationAccess MixerOpen the mixer by pressing F9 or clicking the mixer button to access recording configuration.Select Input Device• Choose a mono input device from the dropdown (Analog 1 or Analog 2) • Select the preamp from your audio interface • USB microphones should appear in this list as wellSignal LevelSet input signal to be slightly quieter rather than loud, as you can boost gain later but cannot recover from distortion.Track OrganizationRename the mixer track to 'recording' and assign it a color for better organization and visibility.
- Recording Arm and Track SetupArm RecordingClick the 'Arm Dis Recording' button on the mixer track to tell FL Studio which track should receive the audio recording.Playlist Preparation• Navigate to the playlist and rename the track to 'recording' • Select the section where you want to record by holding Ctrl and left-clicking to select bars • Choose a countdown before recording to prepare for timingEffects NoteEffects added before recording become permanent and cannot be removed after recording, so only add effects you are completely comfortable with.Recording ModeSelect 'Audio into the Playlist as an Audio Clip' as the recording destination method.
- Single Recording and Track ManagementRecording ProcessHit the record button, which provides a countdown and then records your voice as a visible wave file preview in the playlist.Post-Recording Steps• Double-click the recorded clip to send it to the desired track (e.g., vocal track) • Rename the clip by pressing F2 and entering a new name • Delete unwanted recordings by right-clickingWave File ConsolidationThe wave file preview becomes a consolidated actual track once recording finishes.File OrganizationSend all vocal recordings to the same mixer track to maintain organization throughout your project.
- Loop Recording and Multiple TakesLoop Recording FeatureEnable loop recording to continuously record takes within your selected section until you are satisfied, then automatically loop back to the start.Take Management• All vocal takes are automatically grouped together underneath the original recording • Takes are initially muted and appear grayed out in the playlist • Press play to hear nothing until you unmute individual takesUnmuting Takes• Press T and left-click to unmute takes • Right-click individual tracks and select unmute to enable them manuallyStop and ResetPress stop when finished recording, then turn off the recording arm to complete the loop recording session.
- Consolidating and Editing TakesTake Selection StrategyReview all takes and pick the best sections from each - you can use the start of one take, middle of another, and end of a third.Consolidation Process• Select all takes together by holding Ctrl and dragging across them • Go to Playlist Options > Tools > Consolidate Playlist Selection • Click 'From Selection Start' to merge all selected takes into one clipNew FeatureConsolidating is a brand new feature in FL Studio 20 that makes combining multiple takes into a single clip seamless.ResultAll three takes are merged into a single consolidated clip containing your best performance sections.
- Punch-In Recording for Partial Re-recordingWhen to Use Punch-InUse punch-in recording when you like the start and end of a take but need to re-record just the middle section.Marker Setup• Press Alt and T to add a marker at the beginning of the section to punch in • Drag the marker to the correct position • Right-click and select 'Punch In Recording'End Marker Configuration• Add another marker at the end of the section needing re-recording • Drag it to the correct position • Right-click and select 'Punch Out Recording'Recording ExecutionPress play instead of record, and the audio automatically records only between the punch-in and punch-out markers, stopping at the end.
- Final Tips and Best PracticesOrganization PrinciplesStay organized by sending all vocals to the same mixer track, keeping your entire project neat and tidy.Content VersatilityThis recording method works for vocals, guitars, drums, and essentially any audio source you want to record in FL Studio.Additional ResourcesCheck out other videos in the basics series and across the channel for recording tips, tricks, and production techniques.Workflow SummaryThe complete process involves configuring audio settings, setting up the mixer, arming tracks, recording to the playlist, and consolidating takes.