FL Studio Basics - The Mixer
The mixer is where you're going to be sending all of the audio in your project and this is where your songs really going to come to life
6 chapitres
- Introduction to the MixerOverviewThe mixer is where all audio from your project is sent and where songs come to life through volume control, panning, effects like reverb and delays, and side-chaining.Key Features• Change levels and panning of audio tracks • Add effects such as reverb and delays • Route and send audio throughout the project • Customize and organize your mixing workspaceAccessibilityPress F9 to open the mixer or use the button at the top of the interface.Ease of UseFL Studio makes the mixer super simple and highly customizable, split into three main sections for organized workflow.
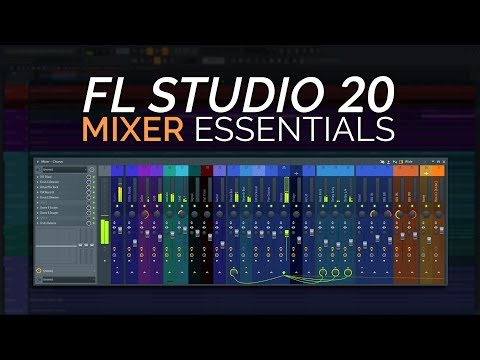
- Mixer Layout and CustomizationThree Main Sections• Current track: displays volume level and allows adding effects to individual tracks • Master track: receives all audio for mastering and full mix bus effects • Middle dock: holds individual tracks for drums and instruments with separate effectsResizing OptionsResize vertically from the top, horizontally from sides, and drag to dock the mixer into different screen positions.View Customization• Compact button offers wide view and extra-large view options • Track inspector can be moved from right to left side • View settings include DB meter, waveform, naming, routing cables, and brightness adjustmentRight-Hand DockAccess additional sends and normal mixer tracks by clicking the gray bar on the right side.
- Track Controls and Effects ChainIndividual Track Elements• Track number and insert name (customizable by right-clicking and renaming) • Mute button to silence the track • Panning dial to send audio left, right, or center • Fader to control output volumeAdvanced Controls• Polarity swap to reverse phase • Left/right channel swap for stereo adjustment • Stereo width adjustment from mono to wider stereo • Effects on/off button and plugin delay compensationEffects ChainEach track can have up to 10 effects with options to mute individual effects and blend wet and dry signal for each effect.Recording FeaturesArm disc button enables recording through the mixer, with detailed coverage available in previous channel videos.
- Routing and Audio FlowBasic Routing• Scroll up in channel rack box to route individual channels to mixer tracks • Select multiple channels together and use 'route selected channels starting from this track' option • Audio cables at bottom show routing paths and signal destination percentagesGroup CreationHold Ctrl+Shift, select channels, right-click and choose 'route to this track only' to create sub-mixes like drum groups.Advanced Routing Options• Sidechain routing for dynamic processing • Route to specific track options for different signal destinations • Hover over routing values to see hint box with signal percentage informationVisual OrganizationAdd separators by right-clicking and selecting group to visually distinguish between different track groups in the mixer.
- Practical Mixing TechniquesSolo and MuteUse solo to isolate individual tracks like the snare for mixing, then mute or unmute as needed during playback.Panning and Stereo• Pan signals to the left and right for stereo placement • Reverse polarity to adjust phase relationships • Swap left and right channels for stereo width control • Adjust stereo separation from mono to wider stereoVolume and EffectsVolume fader adjusts output after effects, so reverbs, delays, and EQ are applied before the final level control. Reference gain staging video for detailed information.Organization Tips• Name tracks descriptively using right-click rename • Use colors to organize and distinguish different groups • Add icons to tracks for visual organization • Maintain consistency in naming conventions throughout your project
- Tips and Best PracticesBuilt-In HintsFL Studio provides hint information in the top left corner whenever you hover over dials or buttons, helping you understand unfamiliar controls.Waveform DisplayChange meter display to waveforms for visual representation of audio, which is particularly useful when programming drum grooves.Workflow Integration• Customize mixer settings to match your screen resolution and eyesight • Find a mixer layout that fits naturally into your workflow • Don't be afraid to experiment with different customization options • Adjust brightness and view settings for professional appearanceGetting StartedThere's nothing to be scared of in the mixer. Use the hint box, experiment with controls, and discover options over time to build confidence and create your desired sound.