
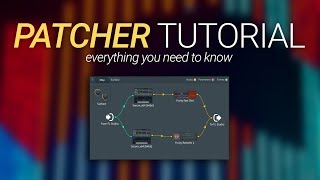

How To Use Patcher - Everything You Need To Know - FL Studio 20 Basics
11 chapitres
- Introduction to Patcher PluginOverviewPatcher is a plugin often overlooked by FL Studio producers due to a perception of being overly complicated, but it is actually simple and straightforward once understood.Common MisconceptionsMany producers neglect Patcher because it has a stigma of being overcomplicated, often because some users employ it in complex ways.Video Goals• Build practical examples demonstrating Patcher's capabilities • Create a house bass instrument with separated low and high sections • Design an effects chain to save mixer space and explore parallel processing techniquesWhy Learn PatcherUnderstanding Patcher opens up new creative possibilities for sound design and organization that simplify the production workflow.
- Loading and Basic RoutingLoading Methods• Load on the channel rack by pressing the plus icon and selecting from the Patcher section • Load on the mixer by finding an empty insert slot and selecting Patcher from the plugin menuCore ConceptAudio or MIDI signals must be patched to designated destinations within Patcher to function; without connections, no audio will pass through.Signal FlowAudio comes into Patcher from FL Studio (input node) and must be routed out to FL Studio (output node); connections are made by clicking and dragging cables.Signal Control• Rotate dials to control the amount of audio passing through connections • Right-click connections to mute signals entirely
- Effects Chain SetupAdding PluginsRight-click on the control surface and select 'Add Plug-in' to load any available plugin, including reverbs, compressors, delays, saturation, and EQs.Building the Chain• Load Fruity Parametric EQ2 and adjust frequency content by removing low and high end • Connect the input from FL Studio to the EQ, then from the EQ to the output • Add Fruity Reverb and set it to 100% wet for parallel processing capabilitiesBlend ControlSince the reverb is 100% wet, control the wet-to-dry blend by adjusting the input level of the dry signal and the output level of the reverb return.Space EfficiencyThis effects chain setup uses one Patcher instance instead of requiring three mixer channels and four plugins, saving valuable mixer real estate while maintaining full control over each plugin.
- Advanced Effects Chain with DelayAdding DelayAdd Fruity Delay Free set to 100% wet and connect it to both the FL Studio input and output for parallel processing; adjust level and cutoff settings.Cleanup and EQIf the delay sounds muddy, add an EQ after the delay to remove low-end and clean up the overall tone.Signal VisualizationThe visual interface shows signal paths clearly: dry signal passes through to the output, while parallel chains route through EQ, reverb, and delay separately before recombining.Efficiency ComparisonThis multi-plugin setup within Patcher accomplishes complex processing with one plugin instance and one insert slot, whereas the traditional mixer approach would require multiple channels and routing.
- Creating Instruments with PatcherSetupLoad Patcher in the channel rack (which carries MIDI data via the green dot) and begin adding synthesizer plugins like Serum to build a multi-part instrument.Multi-Part Design• Create parallel signal paths for low bass and high bass using separate Serum instances • Route each synthesizer instance to the FL Studio output independently • This allows independent volume and effect control for each partSignal RoutingMIDI notes come from FL Studio, are processed by the synthesizers, and audio returns to FL Studio; each synthesizer can be muted or adjusted by right-clicking its output node.Foundation EstablishedThe basic two-part bass instrument is now functioning with separated low and high components ready for additional effects processing.
- Adding Effects to Individual PartsHigh-End ProcessingRoute only the high bass through Fruity Reverb and an EQ; disconnect the direct output and create a new chain for parallel reverb processing.Effect Parameters• Set reverb decay and tone to complement the high bass without affecting the low bass • Use the EQ after reverb to remove excess low-end and shape the final tone • Blend the reverb level into the overall mixSeparation BenefitsBy applying reverb only to the high-end part, the low bass remains tight and controlled while the high-end gains depth and space.Visual OrganizationThe patching interface clearly shows which effects apply to which synthesizer, making the sound design intention immediately obvious.
- Parallel Processing and DistortionAdding DistortionDisconnect the top output of the high-end chain and add Fruity Fast Distort to create parallel distortion processing on the low bass.Parallel TechniqueRoute the low bass both directly to the output and through the distortion plugin; this blends the clean and distorted signals for a balanced, powerful tone.Sound CharacterEnabling the distortion adds grit and harmonic content to the low bass, creating a more aggressive and present sound compared to the clean bass alone.Setup AdvantageParallel processing within Patcher allows full control over the blend of clean and processed signals without requiring separate mixer channels.
- Creating Control Surfaces with DialsActivating Parameters• Click on the 'Mix' dial of the distortion to activate automation control • Activate the reverb 'Wet' level dial to enable control via the Surface tabControl CreationIn the Surface tab, use the Control Creator to add custom sliders, dials, buttons, or XY controllers; these appear as new control elements on the interface.Customization• Change control colors and appearances to match your preference • Resize and reposition controls by switching between edit mode (spanner icon) and pointer modePurposeControl surfaces allow real-time manipulation of multiple parameters simultaneously, enabling intuitive interaction with complex sound designs.
- Linking Controls to ParametersConnection MethodRed nodes appear on the Map tab for both surface controls and activated parameters; click and drag cables to connect controls to specific plugin parameters.Example Setup• Link a slider to the reverb level of the high bass • Link a knob to the distortion mix level of the low bass • Moving these controls in real-time adjusts the respective effect amountsMulti-Parameter ControlA single control can be linked to multiple parameters simultaneously; disconnecting and reconnecting cables allows one control to influence both reverb and distortion together.Real-Time ManipulationWith controls linked to distortion and reverb, manipulating a single dial creates complex, layered sound variations instantly while the bass is playing.
- Creative Sound Design with VisualizationPower of VisualizationThe patching interface visually demonstrates signal flow: MIDI enters from FL Studio, splits to low and high bass paths, each with separate effects, then recombines at the output.Workflow Benefits• Modular patching approach appeals to producers who think in terms of cables and signal routing • Visual representation makes complex sound designs immediately understandable • Easier to experiment and iterate on signal chains compared to mixer-based routingCreative PotentialThe combination of multiple synthesizers, effects, and control surfaces enables sophisticated sound design; simple dial movements can create dramatic changes to texture and character.Accessibility NotePatcher is not for everyone; some producers prefer traditional mixer routing, but for those comfortable with modular thinking, it offers a powerful and intuitive workflow.
- Conclusion and DownloadSummaryPatcher is a versatile plugin for both effects chain organization and complex instrument design, enabling creative sound design while maintaining visual clarity.Key Takeaways• Simple concepts (cables, plugins, controls) form the foundation of Patcher • Practical applications range from saving mixer space to creating sophisticated instruments • Visual interface aids understanding of signal flow and parameter interactionsResourceThe cleaned-up patch created during the tutorial is available for free download via a Google Drive link in the video description for viewers to study and modify.Learning ApproachThis tutorial demonstrates learning through practical creation rather than isolated feature explanation, walking through the entire design process to make concepts more intuitive and memorable.




