
Sytrus Tutorial - Everything You Need to Know
You'll learn how to control the plugin, how to generate and shape different sounds, and add unison and reverb and other effects to make your sounds really professional, wide, and lush
19 chapitres
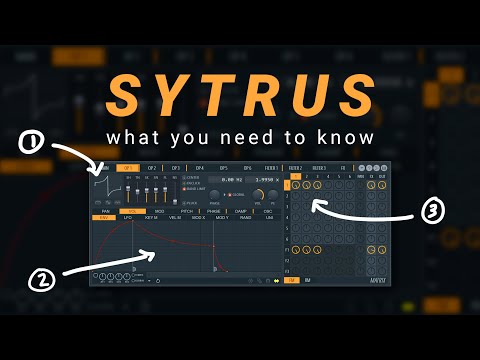
- Plugin Interface OverviewMain Components• Main panel with general synth settings • Six operators (oscillators) that generate sound • Three filters to shape frequency content • Effects section with chorus, reverbs, and delaysControl Layout• Matrix for routing signals between components • Keyboard for playing notes (can be toggled on/off) • Graph/curve editor for detailed controlStarting PointLoad the default preset to begin exploring and understanding how Sytrus generates soundNavigation TipAll controls are labeled at the top left corner of FL Studio for easy reference
- Waveform Selection and Basic Oscillator ControlWave Types• Sine wave as the default • Triangle, sawtooth, and square waves available • Combinations of multiple waves possible • Selection via slider or dropdown menuSound ShapingVarious controls shape the wave in subtle or dramatic ways, with options like de-click and pluck that dramatically alter the sound characterVolume ControlOscillator output volume can be adjusted independently on the right side of the operator panelKey Controls• De-click: removes clicking artifacts • Pluck: creates plucked sound characteristics
- Understanding the Matrix and Signal RoutingMatrix StructureGrid with rows and columns for each of six operators, three filters, effects, and output for controlling signal flowHearing SoundTo hear output from an operator, route its row to the output column and ensure the level is turned upMulti-Operator MixingMultiple operators can be heard together by routing each operator's row to the output and adjusting their individual levelsNavigation FeatureClicking any row or column in the matrix automatically selects the corresponding operator for editing
- Volume Envelopes and ADSR ControlADSR EnvelopeAttack, Decay, Sustain, Release control how volume changes over time when a key is pressedEnabling EnvelopesMust toggle the envelope on in the volume envelope section to activate its effect on the soundCurve Adjustment• Click and drag envelope points to reshape the curve • Adjust tension of curves by dragging the small nodes between points • Use dials below the curve for precise controlModulation AlternativesVolume can also be controlled using LFOs or different keyboard keys instead of envelopes
- Panning with LFO ModulationLFO ControlLFO modulation can control panning to create left-to-right movement following an envelope curveEffect ResultPanning oscillates smoothly between left and right channels for a dynamic stereo effectControl ParametersPanning, volume, pitch, and phase can all be controlled using envelopes, LFOs, or keyboard keysModulation OptionsChoose from various modifiers to customize how each parameter responds to input
- Unison and Voice LayeringUnison FeatureAdd multiple voices (up to nine) to create a richer, wider sound from a single operatorVoice Customization• Adjust unison type from mono to wide • Control detune amount for subtle or dramatic pitch variation • Change voice distribution to original, uniform, or blurred modesDistribution ModesSimilar to synthesis tools like Serum, offering flexible voice distribution optionsSound CharacterUnison creates thicker, more professional-sounding patches with enhanced depth and width
- Quality Settings and OversamplingOversampling LevelsEight times oversampling is the standard for high quality that matches what you hear before and after exportingQuality MatchEnsure quality settings are identical between preview and export to guarantee the sound remains consistentHigher OversamplingAdditional oversampling provides more precision and higher quality but significantly increases CPU usagePractical RecommendationEight times oversampling produces extremely high quality sounds without excessive CPU strain for most users
- Filter Types and Cutoff ControlFilter Basics• Low pass, high pass, and other filter types available • Slope steepness options: 12 dB per octave (one), 24 dB (two), 36 dB (three)Essential Controls• Cutoff: controls the filter frequency • Resonance: controls emphasis at the cutoff frequencyStatic vs DynamicWithout modulation, filters act as static EQ; with envelope control, they respond dynamically to the synthMatrix RoutingRoute operator to filter, then filter to output to hear the filtering effect on the sound
- Envelope-Based Filter ModulationDynamic FilteringTurn on the filter envelope and select cutoff as the control parameter to make the filter responsivePluck EffectShape the envelope to create a plucked sound effect with the cutoff opening and closing over timeEnvelope ImpactMore dramatic envelope curves create more pronounced filter sweeps and tonal variationsSound ShapingEnvelope control allows creation of expressive, dynamic sounds that respond naturally to your playing
- Keyboard-Based Filter AdjustmentKey MappingUse key mapping to make cutoff frequency dependent on which key is pressed on the keyboardBrightness Control• Higher keys can have lower cutoff (less bright) • Lower keys can have higher cutoff (brighter) • Inverse relationship creates natural brightness variationPractical ApplicationBrass synthesizer patches benefit from rolling off high-end on higher keys for a more pleasant toneVisual FeedbackThe graph shows different white lines for each key, representing their respective filter cutoff values
- Wave Shaper and Filter EnhancementDistortion AdditionWave shaper allows blending in varying amounts of distortion to the filtered soundSimple ControlEither add distortion or don't—straightforward parameter with no complex interactionSound CharacterCreates brassy, wobbly texture when combined with filter envelope modulationIntegrationWorks alongside the filter to shape the overall tonal character of the synth patch
- Effects Section Setup and RoutingAvailable Effects• Chorus: adds depth and width • Reverb: adds spatial ambience • Delays: adds rhythmic repetitions • Effects send: routes signal to external processingMatrix RequirementRoute the operator row to the effects column in the matrix to enable effect processingEffect ResultApplying effects creates lush, professional-sounding textures with depth and dimensionQuick EnableSimply turn on the desired effect in the effects panel once routing is established
- Delay and Reverb ConfigurationDelay Options• Three stackable delays available • Control feedback and timing parameters • Create rhythmic repetition and spaceReverb Presets• Access presets from Fruity Reverb 2 dropdown • Options include drum room, venue, and other ambiences • Each preset provides distinct reverb characterReverb ControlAdjust typical reverb parameters like decay time, diffusion, and early reflectionsSound ExplorationExperiment with different preset combinations to discover desired reverb texture
- Chorus Effect and Depth EnhancementChorus ActivationTurn on chorus by increasing the order parameter in the effects sectionSound Impact• Adds depth to the sound • Adds width and stereo dimension • Creates classic, rich synthesizer textureClassic UseChorus is a fundamental effect in synthesizer design for adding subtle richnessDepth CreationSimilar to unison, chorus creates thicker, more professional-sounding patches
- Effect Send and Parallel ProcessingSend FunctionSend parameter duplicates the signal to additional mixer tracks (one right, two to the right, etc.)Parallel Processing• Does NOT send an affected version of the signal • Allows separate processing and effects on parallel tracks • Enables blending of processed signal back with originalCreative Applications• Add distortion to parallel track • Apply custom delays or reverbs • Blend processed and original soundsWorkflow BenefitAvoid manual side-chaining on the mixer by using Sytrus's built-in send capability
- Global Synth Parameters and Main Tab ControlsCore Controls• Global volume: master output level • Global pitch: transpose entire synth • LFO enable/disable: toggle all LFO modulationEnvelope AdjustmentMaster envelope control allows subtly adjusting all ADSR curves at once for consistent envelope behaviorPerformance Features• Modulation X/Y: for live performance linking to parameters • Built-in EQ: affects output, effects, or bothMixing ApproachFor best results, use a powerful external EQ after Sytrus rather than relying on the built-in EQ
- Frequency Modulation (FM) Synthesis BasicsFM ConceptModify one operator with the signal from another operator to create complex, evolving timbresFM Characteristics• Often produces metallic sounds • Creates metallic shimmer and complexity • Significantly transforms the base waveformMatrix Reading• Read the FM column: if operator 3 modulates 2, then 2 modulates 1 • Alternatively: operator 3 to 1 and 2 to 1 creates different results • Order matters when chaining modulationSelf-ModulationAn operator can be set to modify itself for additional tonal variation
- Ring Modulation (RM) and ExperimentationRM PrincipleRing modulation works on the same principle as FM: one operator affects anotherDifferent ResultsRM produces distinctly different tonal characteristics than FM despite using similar routing conceptsLearning Approach• Deep study of FM and RM requires hours of dedicated exploration • Best learned through hands-on experimentation • Listen and adjust based on what sounds goodKey PrincipleSound quality matters more than the generation method used to create it
- Sound Creation Philosophy and MasteryPractical LearningThe best way to learn Sytrus is to dive in, experiment, and listen to the resultsQuality AssessmentIf a sound is good, it is good—purpose and context matter more than techniqueHands-On PracticeAchieve mastery through experimentation and active sound design rather than theory aloneToolkit ValueWhen learned, Sytrus becomes a very rewarding and powerful tool in music production arsenal




