
FL Studio Flex - First Look and Full Tutorial
8 chapters
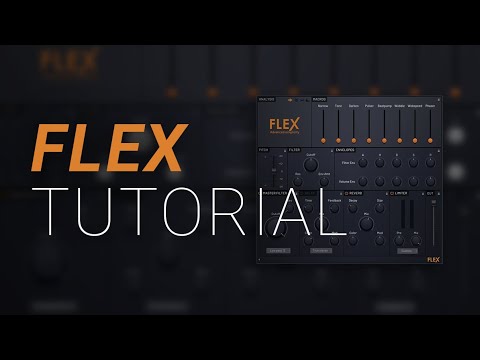
- Introduction and Plugin OverviewWhat is FlexFL Studio Flex is a brand-new stock and free plugin included in FL Studio 20.2 Fruity Edition and up. It is designed as an advanced synthesizer with a focus on usable, professional-sounding presets rather than designing sounds from scratch.Core PhilosophyThe plugin works similarly to Nexus by loading high-quality presets that sound good immediately, then allowing users to tweak and analyze them to customize the sound to their liking.Sound Diversity• Includes excellent bass presets • Wide variety of pad sounds • Incredible strings with staccato and cello options • Multiple preset packs available with more free and paid banks coming soonGetting StartedLoad the plugin onto the channel rack by pressing the plus button and selecting Flex from the plugin list. The plugin can be resized and customized for your workspace.
- Analysis and Macro ControlsVisual Feedback SystemThe Analysis panel displays visual feedback while playing chords. Different display modes show frequencies, stereo separation, or tonal balance with lows on the right and highs on the left.Macro Controls• Narrow and Wide controls adjust the spatial character of the sound • Tone control shapes the brightness or darkness of the preset • Fuller and Thin options adjust the density of the sound • Darken control cuts high-end frequencies for a darker characterAutomation IntegrationRight-click any control to create automation clips that adjust parameters over time in the playlist. Alternatively, right-click to link controls to external MIDI controllers by moving their faders or dials.Control ScopeMacros provide broad, relatively simple controls without fine detail, designed for quick sound shaping without requiring deep sound design knowledge.
- Pitch and Filter ControlsPitch AdjustmentPitch control changes the note pitch up or down. Plus and minus buttons move the pitch by one hundred cents at a time, making it easy to adjust by exact semitone increments without scrolling.Filter BasicsThe Filter cutoff determines whether the sound is bright or dark. Low settings produce darker sounds, while high settings produce brighter sounds with more high-frequency content.Filter Envelope• Attack controls how quickly the filter opens, affecting the initial brightness of the sound • Envelope Amount fine-tunes the strength of the filter sweep effect • Resonance adds a modular synthesis quality when increased, creating a more pronounced peak • Lower resonance produces smooth, natural filter characteristicsDynamic ShapingThe Filter Envelope Attack parameter controls whether high-end appears immediately or sweeps in gradually. Adjusting resonance and envelope amount together creates the desired filter character.
- Volume Envelope and Master FilterVolume EnvelopeControl how the sound's volume behaves over time with Attack, Hold, Decay, Sustain, and Release parameters. Adjusting these parameters shapes when and how the sound cuts away after releasing the key.Envelope Shapes• Fast attack makes sound jump in immediately • Slower attack creates a fade-in effect • Quick release cuts sound away fast when the key is released • Slow decay extends the sound duration significantly after releaseMaster Filter TypesThe Master Filter at the bottom offers multiple filter types: Low-pass (6 or 24), High-pass (6 or 24), Peak, Phaser, and Notch filters. Low-pass 12 provides gentle curves, while Low-pass 24 delivers steeper, more dramatic frequency cuts.Filter Effect ComparisonLow-pass 12 creates subtle filtering effects, while Low-pass 24 produces noticeably more dramatic frequency reduction. Filter type choice affects how dramatically the sound changes.
- Delay and Reverb EffectsDelay SystemThe Delay effect is based on Fruity Delay 3. Adjust the Mix to control the amount of delay effect, the Decay to set how long delays last, and the Time to control delay tempo.Delay Parameters• Feedback control determines how many delays repeat, from almost none to many repetitions • Color can brighten or darken the delays by cutting high-end or low-end frequencies • Modulation adds pitch variation to the delayed signal • Delay Modes include Fake Stereo, True Stereo, Ping-Pong, and Custom optionsReverb CharacteristicsReverb simulates a real acoustic space. Adjust Mix for the amount of reverb, Decay time to make it lush and long, and Size to control whether it simulates a larger or smaller space.Reverb Fine-TuningColor parameter brightens or darkens the reverb effect. Modulation can be applied to create dynamic reverb characteristics that evolve over time.
- Limiter, Compression and Output ControlLimiter FunctionThe Limiter serves dual purposes: making sure sounds are loud enough and providing distortion and coloring. Pushing harder into the limiter creates a more crushed, compressed, and limited sound.Compression Techniques• Mix control allows parallel compression blending for subtle or heavy effects • Profile options let you choose different limiter characteristics based on sound type • 808s can be distorted and made gritty by pushing into the limiter with higher mix • Multiple profile settings optimize compression for different sound categoriesOutput LevelThe Output box controls the final level going back to FL Studio. Most presets are very loud, so reducing this level when new to the plugin helps prevent mixer clipping.Stacking ManagementWhen using multiple Flex instances, be aware that stacking louder presets can cause mixer clipping. Reducing output levels prevents this issue and maintains headroom.
- Panel Locking and ConclusionLock FeatureEach control box has a lock icon that freezes its settings when switching between presets. This allows you to maintain perfect settings while trying different preset variations.Practical Applications• Lock filter envelopes while trying different bass presets • Keep reverb settings consistent across multiple patches • Maintain volume envelope settings while changing pitch • Experiment with different presets without resetting your customizationsKey TakeawaysFL Studio Flex provides an excellent balance between professional presets and deep customization options. The interface is intuitive and designed for quick sound design without extensive technical knowledge required.Next StepsStart experimenting with different presets and macros to make awesome music. Future videos will showcase favorite presets with detailed breakdowns of 20-30 selections and their unique characteristics.




