18 FL Studio Tips You Need To Know
16 chapters
- De-Clicking Audio SamplesProblemChopped audio samples can produce clicks and pops due to abrupt audio stopping.SolutionOpen the sample and select de-clicking mode with either Smooth or Crossfade option.Result• Smoothly fades audio away • Prevents clicks and pops • Reduces background noiseSound QualityMakes chopped samples sound much more natural and professional.
- Converting Audio to MIDI NotesProcess• Right-click on an audio sample • Select 'Edit in pitch corrector' • Choose 'Send to piano roll'ResultAudio samples are converted to MIDI notes that can trigger synthesizers.ApplicationAllows you to play audio samples as if they were MIDI instruments.TuningMay require fine-tuning to get the best results from the conversion.
- Score Logger for Unrecorded PerformanceFeatureFL Studio continuously records all MIDI input in the background, even when not officially recording.RecoveryGo to Tools > Score Logger > Dump score log to selected pattern to retrieve unrecorded MIDI.TimeframeThe system records and keeps data from the last 30 minutes of playing.Post-ProcessingRecovered MIDI may need quantization or editing for timing and precision.
- Direct Wave Instrument for CPU OptimizationPurposeConverts CPU-heavy synthesizer plugins into sampled instruments to reduce processing load.Process• Right-click on a synthesizer instrument • Select 'Create a direct wave instrument' • Configure number of notes and velocity layersResource TransferShifts processing burden from CPU to RAM and disk space.AutomationFL Studio automatically samples the instrument and packages it as a playable sampled instrument.
- Layer Plugin for Sound StackingChallengeLayering multiple sounds requires copying MIDI between separate instruments, making edits tedious.SolutionUse the Layer plugin with 'Set Children' feature to control multiple instruments with one Piano Roll.Setup• Insert the Layer plugin • Right-click and select channels to link • Press 'Set Children' to combine themWorkflowPlay a single melody that triggers all layered instruments simultaneously, simplifying arrangement and testing.
- Channel Grouping for OrganizationOrganizationGroup related channels to keep projects organized, especially with many tracks.Method• Right-click to select channels • Press Alt + G • Enter a group nameExamples• Bass group for bass instruments • Drums group for percussion elementsBenefitsMakes it easier to track which channels contribute to which sounds in large projects.
- Project Cleanup ToolsUnused ChannelsGo to Tools > Macros > Select unused channels to identify and remove channels without MIDI data.Unused AudioUse Tools > Macros > Purge unused audio clips to delete audio not on the playlist or without note data.Performance ImpactRemoving duplicated channels and unused audio dramatically reduces project size and improves performance.Smart DisableTools > Macros > Switch smart disable for all plugins further cuts CPU load on your project.
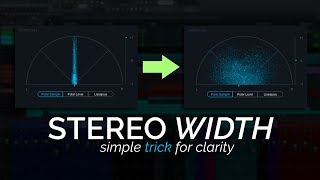
- Stereo Audio VisualizationIssueFL Studio's default audio display can be confusing about whether a track is mono or stereo.Solution• Double-click to select an audio pattern • Right-click and choose 'Multi-channel waveform view'DisplayShows separate left and right channel waveforms, revealing stereo width and different channel content.NoteThis visualization change does not alter the actual sound, only how it's displayed.
- Edison Noise RemovalAccess• Select an empty mixer track • Open Edison with Ctrl + E shortcutProcess• Drag audio sample into Edison • Select a noise-only area by dragging • Right-click brush icon and select the whole sampleApplication• Activate the denoise tool • Reduce the amount setting • Click accept to applyResultsRemoves hiss, electric noise, and static from recordings while preserving audio quality.
- Detaching Plugins for Better WorkflowProblemPlugins can be buried under other windows, requiring constant opening and closing of windows.Quick Fix• Right-click on any plugin • Select 'Detached'Global Setting• Go to Options > General settings • Find Miscellaneous tab • Enable 'Detach all plugins'BenefitAll plugins automatically float on top of other windows, improving focus and workspace efficiency.
- Copying Mixer Presets and SettingsPreset Transfer• Right-click on a plugin • Select 'Save preset' • Drag and drop onto another channelFull Track CopySelect a mixer track, go to File > Save mixer track as, then paste the entire configuration.ConsiderationFull track copying may change track names and doesn't preserve routing, so individual plugin copying is often preferable.Use CaseSpeeds up mixing process by applying similar EQ and compression settings across multiple similar tracks.
- Current Channel for Analysis PluginsPurposeLoad analyzer plugins once on the Current channel instead of on individual tracks to save CPU resources.LocationThe Current channel is located beside the Master channel, possibly docked to the right side.Dynamic Monitoring• Load analyzers on Current channel • Select different channels to analyze them individually • Switch to Master to view the entire mixAdvantageReduces overall CPU usage by loading plugins once instead of multiple instances across different tracks.
- Mixer EQ for Subtle AdjustmentsToolEvery mixer channel has a built-in three-band equalizer located on the channel fader.Application• Making small boosts and cuts • Removing low-end buildup • Adding top-end presenceEfficiencyUses significantly less CPU than loading dedicated EQ plugins, freeing resources for other tasks.Use CasePerfect for subtle changes; for complex EQ work, dedicated plugins with more filter curves are more appropriate.
- Automation Clips and AdjustmentsSlide FeatureThe slide toggle on automation clips can cause unintended movement of all automation points when disabled; usually keep it off.Scaling Levels• Left-click on articulator tools • Select 'Scale levels' to adjust all automation points proportionallyAdvanced ToolsUse the Offset tool to move all automation points up or down uniformly without changing their shape.PurposeThese features allow fine control over automation curves to bring life and dynamics to your mix.
- Metadata for Exported FilesAccessPress F11 to open the Song Info window.Input• Enter your song name • Enter the artist nameAttachmentThis metadata is automatically embedded in exported audio files.DisplayExported files will display artist name and song title when played on different media systems, looking more professional.