
Level Up Your Production with these New Automation Tips
4 chapters
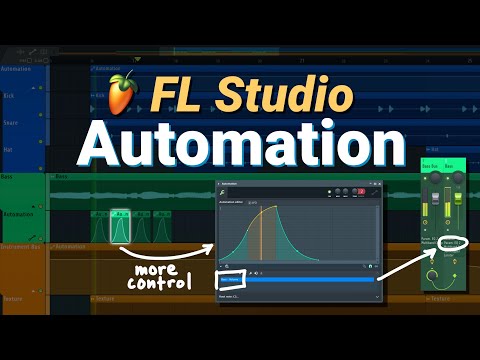
- New Automation Editor in FL Studio 20.9Feature OverviewFL Studio 20.9 introduces a brand new automation editor that provides significantly better control over automation clips compared to the previous method of zooming directly in the playlist.Navigation Controls• Hold Shift and scroll to zoom into any part of the automation clip • Scroll normally to zoom horizontally and vertically • Hold Alt while scrolling for additional zoom control • Press Enter to expand or collapse the editor windowPoint Editing• Right-click to add automation points • Shift + right-click to snap points to the automation clip position • Toggle snapping on or off for precise or free positioning • Press Alt to position points anywhere without snapping • Adjust tensions and modes by right-clicking on pointsAdvanced Tools• Switch between envelope mode and LFO mode • Use the target link section to identify which parameter or plugin is being affected • Add multiple targets to control several parameters with a single automation clip • Access the affected mixer channel directly from the editor
- Practical Applications: Bass Sidechain and EditingSidechain SetupUse the new automation editor to create precise volume automation on bass using fruity balance, reducing volume whenever the kick drum hits for an effective sidechain effect.Precision Editing• Double left-click to open the automation editor for small clips • Add and adjust points with right-click to match the kick timing perfectly • Modify point tension for smooth transitions • Maximize the editor window for easier, more detailed controlGrouping ClipsControl + left-click and drag to select multiple automation clips, then press Ctrl + G to group them together into a single unit for easier management.Undo Options• Press Ctrl + Z to undo the last action • Press Ctrl + Alt + Z to undo multiple steps at once • Original automation clips remain accessible in the channel rack even after grouping
- Range Limiting for Subtle Automation ChangesThe ChallengeStandard automation clips span the full range of a parameter, making it difficult to make small, subtle changes like adjusting volume by just 0.5 dB or 1 dB.Range Limiting ConceptModify the minimum and maximum values of the automation clip to restrict its range, allowing small movements to create small parameter changes instead of large ones.Implementation Steps• Middle-click a fader to reset it to its default value • Right-click and copy the desired value • Paste that value into the minimum field of the automation clip • Set the maximum value to your upper limit • Now the entire automation clip only changes the parameter within that narrow rangeUse CasesEssential for mastering work when you need to push stems or the chorus up by a quarter or half a decibel, and for controlling subtle volume ramps and curves in the mix.
- Cleanup: Removing Automation Clips ProperlyPartial Removal Methods• Right-clicking and removing an automation clip from the playlist does not fully delete it • Right-clicking and deleting from the channel rack removes the clip but leaves residual valuesSticky Value ProblemAfter deleting an automation clip, the parameter may jump back to a fixed value whenever you try to adjust it manually, creating a locked or sticky behavior.Complete Deletion SolutionRight-click directly on the fader or the parameter control (such as in an EQ or reverb) and select 'Delete Initial Value' to completely remove the automation lock.ResultAfter deleting the initial value, the parameter behaves normally again and you can freely adjust it or create new automation clips without any restrictions.




