
FPC Tutorial - Everything You Need To Know - FL Studio 20 Basics
7 chapters
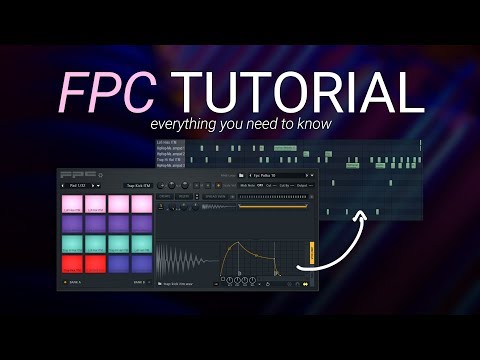
- Introduction and FPC OverviewWhat You'll LearnThis tutorial covers the FPC plugin in FL Studio, from basics and beginner concepts to detailed explanations of all functions. Practical applications in beat making and production will also be demonstrated.Equipment RequirementsWhile the FPC can be triggered with an Akai Fire controller, MIDI keyboard, or drum pad, a MIDI controller is optional. You can follow along and use the plugin without any external hardware.Plugin BasicsThe FPC is a drum machine with a classic Akai MPC 16 pad layout. You load pads with different samples (drums or melodic samples) and can play them with your fingers, record them, or program them in the piano roll.Interface CustomizationThe FPC plugin is completely resizable, including the ADSR envelope display. You can adjust the window size to fit your screen, whether working on a laptop or desktop computer.
- Pad Properties and ControlsPad SelectionClick on a pad to select it and view its properties. The display shows which pad you have selected (out of 32 total pads across two banks) and the sample(s) loaded on that pad.Global Settings• Volume - controls the overall pad volume and affects all layers • Pan - pans everything left or right • Pitch - adjusts the pitch of the entire pad • Mute/Solo - silences or isolates the pad • Velocity button - when orange, soft hits play quiet and hard hits play loudMIDI and RoutingEach pad is assigned a MIDI note (for example, the snare is D3). Pads can be routed to different mixer tracks using the output setting, allowing separate processing for individual drums without affecting others.Cut GroupsCut and Cut By parameters control whether one pad stops playing when another is pressed. This creates realistic drum behavior, like a closed hi-hat cutting off an open hi-hat, and prevents melodic samples from clashing together.
- Velocity Layers and ADSR EnvelopeUnderstanding VelocityClicking at the top of a pad produces low velocity (softer sound), while clicking at the bottom produces high velocity (louder sound). Multiple samples can be loaded on one pad and assigned to different velocity ranges.Layer Management• Create new layers by pressing the Create button and dragging samples onto the pad • Delete individual layers with the Delete button • Reorder layers by pressing the move up/down buttons • Adjust volume, pan, and pitch for individual layers without affecting other samplesADSR ControlsThe ADSR envelope (Attack, Decay, Sustain, Release) shapes the volume curve of a sound. Attack controls how quickly the sound starts, sustain determines the tail length, and release controls how quickly the sound dies after the pad is released.Practical ApplicationsADSR adjustments are particularly useful when loading melodic samples, allowing you to control how sounds cut off or fade smoothly. Experimenting with these parameters helps you understand and master envelope shaping.
- Building Your Custom Drum KitLoading SamplesStart with an empty kit by selecting the Empty preset. Drag samples from your computer or FL Studio's sample packs directly onto any pad. Samples can be kicks, snares, hi-hats, or melodic loops.Organizing Your KitRename pads and change their colors to organize your kit visually. When loading multiple samples on one pad, use the Spread Even button to automatically split them across velocity levels.Melodic Sample SetupAssign melodic samples to different cut groups to prevent them from playing simultaneously and creating a muddy, blurry sound. Each melodic sample should have its own cut group for clean playback.Kit CustomizationUse the dropdown menu on each pad to change colors, icons, and names. Explore additional options for saving and organizing your drum kit to match your personal workflow and style.
- Finger Drumming and Recording TechniquesRecording Approaches• Finger drumming - practice playing pads with your fingers and record performances • Individual parts - record the kick and snare first, then add hi-hats, then melodic samples • Combined recording - attempt to play everything together while recording • Piano roll entry - paint notes directly in the piano roll for precise controlBeginner TipsStart without a metronome to feel the rhythm naturally. As you gain confidence, enable the metronome and use loop recording to capture individual drum components. Arrange samples ergonomically on pads to match your playing style.Piano Roll AdvantagesUsing the piano roll gives you full control available in FL Studio's standard piano roll, including note stutters, velocity adjustments, and precise placement. This approach eliminates the need for a MIDI controller.Practice and DevelopmentFinger drumming opens up new rhythmic possibilities and builds confidence in drum programming abilities. Even beginners should practice this technique, as it significantly improves overall drumming skills over time.
- Saving and Exporting Your KitPreset SavingSave presets of your custom kit directly to your computer. As long as samples remain in their original locations, the preset will load correctly. This is the simplest method for personal use.Export Options• Export kit as pad presets for sharing • Export all WAV files from the 16 pads • Export for FL Studio Mobile • Explore manual and other file format options based on your needsMIDI Mapping SetupTo properly map a MIDI controller to the FPC, go to the Map Notes option. Press the controller's lowest left pad first, then press each pad in sequence up to the last pad. This ensures correct mapping for future sessions.TroubleshootingIf MIDI mapping doesn't work after loading a pad preset, revisit the mapping process. Refer to the dedicated MIDI controller setup video for detailed guidance on resolving mapping issues.
- Conclusion and Creative ChallengesKey TakeawaysThe FPC tutorial has covered all essential aspects of the plugin, from technical details to practical music-making techniques. Whether you're a beginner or experienced producer, the FPC offers multiple approaches to beat creation.Breaking HabitsChallenge yourself to incorporate FPC-style beat making into your next project, or if you primarily use this workflow, try step sequencing or dragging samples into the playlist. Mixing different production approaches expands creative possibilities.Personal GrowthFinger drumming seemed impossible at first but became natural after dedicating time to practice. Learning new workflows significantly improves drum programming abilities and opens up different rhythmic opportunities.EncouragementIf you feel stuck in one production style, trying a new approach can spark creativity and lead to great results. Stepping outside your comfort zone with tools like the FPC can transform how you view music production.




