The RIGHT way to use Compression - Detailed Mixing Tutorial
9 chapters
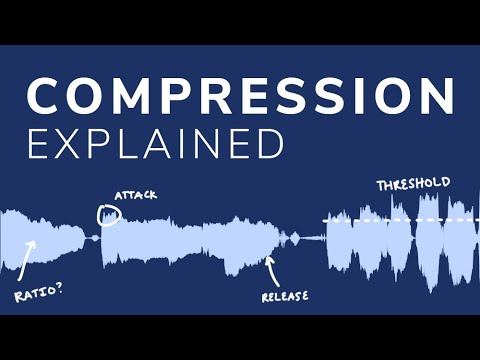
- Introduction and Compression FundamentalsVideo OverviewMichael from In The Mix explains compression basics including attack, release, threshold, and ratio, then demonstrates practical application in mixing rather than just theory.Core Purpose• Compresses loud parts to balance quiet and loud sections • Adjusts transients to make sounds punchier or smoother • Increases sustain on instruments like electric guitarTeaching ApproachUses real vocal examples from a song with Calvin, demonstrating compression techniques on challenging material using FL Studio 20.Key TakeawayUnderstanding compression theory is less important than learning to hear and apply it effectively in context with the full mix.
- The Critical Rule: Always Listen in ContextThe Problem with SoloCompressing in solo is misleading because compression is about dynamics, levels, and transients relative to other elements, not individual sounds in isolation.Real-World ExampleThe vocal sounded confident and clear alone, but in the mix with aggressive guitars competing for space, it drifted wildly in volume and lost clarity, especially on word endings.Why Context Matters• Hear the whole instrumental to understand how the vocal sits • Avoid spending hours compressing solo material that sounds good but fails in the mix • Understand frequency masking and how elements interactProfessional PracticeAlways adjust compression parameters while listening to the complete mix to ensure the result actually works with all other elements.
- Setting Your Compression GoalClear IntentAbout 70% of the time when compressing, have a specific aim for what you want to achieve. The other 30% is experimental sound design.Visual AnalysisComparing uncompressed and compressed waveforms shows the compressed version looks fatter with less difference between peaks and low-level information, creating a thicker, more consistent vocal.Compression vs Automation• Manual gain automation can achieve similar results but requires 45 minutes to an hour per vocal • Compression accomplishes similar goals in minutes for quicker results • Professional mixing often combines both techniquesPractical GoalMake the vocal sound confident and not weak by maintaining consistent volume throughout phrases and preserving punch at word starts.
- Threshold and Ratio ExplainedSetting ThresholdLower the threshold until you can see and hear some gain reduction occurring on the signal. Initial compression will sound like random volume reduction until other parameters are adjusted.Understanding Ratio• 2:1 ratio is gentle - need 2dB over threshold to get 1dB output reduction • 5:1 ratio is moderate - need 5dB over threshold to get 1dB output reduction • Higher ratios like 10:1 or 20:1 approach limiting behaviorGentle vs AggressiveFor vocals that are inconsistent throughout, use a gentle ratio to apply continuous compression across the whole performance. For one word that jumps up, use a stronger ratio to specifically target that peak.Initial SetupDon't aim for specific compression amounts like 3-6dB. Set ratio to at least 2:1 and adjust threshold until you see compression occurring, then add makeup gain to restore original volume.
- Attack and Release: The Timing ControlsAttack Time FunctionDetermines how quickly the compressor reduces gain after the signal passes the threshold. Fast attack removes transients making vocals sound heavy and muffled, while slow attack preserves punch and clarity.Common MistakeBeginners often set super-fast attack times causing vocals to sound like mush. Forget specific numbers and listen for whether you can hear the punch at the start of each word.Setting Attack by Ear• Close your eyes to focus hearing without visual distraction • Listen for punchy transients on words like 'bags' • Longer attack times around 50ms typically work well for vocals • Adjust until the start of each word sounds clear and definedRelease Time FunctionDetermines how quickly the compressor recovers after the signal falls below threshold. Too fast makes vocals chop unnaturally, too slow makes everything sound turned down. Set release to recover musically between words.
- Release and Makeup Gain ApplicationMusical RecoverySet release time so the compressor completely recovers between words rather than constantly applying compression, allowing the gain to add back detail and clarity.Makeup Gain EffectEverything that isn't being compressed receives the makeup gain boost. If compression averages 4-6dB reduction, add back 3dB makeup gain to boost low-level details while keeping loud parts controlled.Knee ControlNot available on all compressors. When present, it softens the threshold transition from no compression to full compression, creating smoother application that develops better as your ears train.Parallel Compression BlendingBack off the wet/processed signal to 70-80% instead of 100% to let more natural sound come through, softening the effect and preserving character while still controlling dynamics.
- Vocal Compression Results and Hearing the DifferenceBefore and AfterWithout compression the second phrase's 'tonight' gets buried and loses clarity. With compression it sits forward with clear detail. The word 'leave' loses confidence without compression but sounds strong with it applied.Natural-Sounding ProcessingEven with significant compression applied, the vocal sounds more natural and confident, not unnatural or obviously processed, because the processing maintains transient punch and dynamics.Key Listening Points• Notice how transients jump out at word starts • Hear the vibrato and emotion preserved in the vocal • Listen on speakers to hear the 3D imaging better than headphones • Focus on how word endings don't disappear under competing guitarsCompression ImpactThe overall effect transforms a vocal that sounds anxious and inconsistent into one that sounds confident, consistent, and professionally balanced in the mix.
- Advanced: Sustain Enhancement with GuitarSustain ChallengeAcoustic guitar naturally lacks sustain compared to electric guitar. Simply adding reverb doesn't create the desired sustained effect - the reverb tail doesn't last long enough.Compression SolutionUse compression to lower the volume of the initial pluck and apply makeup gain to the tail, allowing reverb to swell back up with much more perceived sustain and volume.Technical Setup• Keep threshold set, increase input and output gain together • Use medium-fast release so gain reduction recovers quickly • Watch the gain reduction meter as it recovers back to zero • Hear the reverb swell up as compression releasesElectric Guitar ApplicationCompression pedals are beloved by guitarists for this exact reason - creating massive sustain that smooths everything out and adds volume to the tail of notes without changing the reverb size itself.
- Conclusion and Next StepsKey Principle ReminderListening with everything together makes hearing compression differences much more effective than solo listening, despite seeming counterintuitive. Avoid wasting hours compressing in isolation.Main Takeaways• Always compress in context of the full mix • Have a clear goal when adjusting compression settings • Set parameters by listening, not by looking at numbers • Close your eyes to focus on hearing transients and detailsPractical ApplicationCompression works on many instruments beyond vocals, with different ratio and release settings needed for different material. Understanding these fundamentals applies across all sources.Future ContentDrum compression will be covered in a future video where compression rules work differently and more creatively than with vocals and guitars.