
Sidechain Compression Masterclass - Advanced Mixing Tutorial
5 chapters
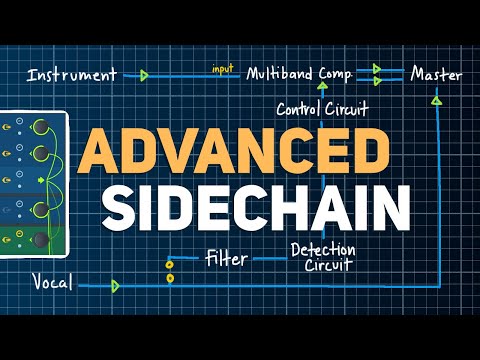
- Introduction to Sidechain Compression for MixingPurposeCreate space and separation between different tracks in a mix and improve understanding of signal flow.ApproachFocus on frequency masking and creative ways to automatically carve out space between tracks rather than simple kick and bass sidechain compression.UniversalityAll techniques can be applied in any DAW as they all have the same basic tools.Next StepsOpen a session and explore practical examples of sidechain compression applications.
- Vocal and Keys Separation Using Dynamic EQProblemVocal and instrumental tracks overlap, creating frequency masking that reduces clarity of both elements.Solution• Create a sidechain from the vocal track to the keys track • Load a Dynamic EQ or multi-band compressor (Pro MB or free TDR Nova) • Enable external sidechaining in plugin settingsExecutionCreate a wide band from mids through treble and reduce threshold so compression triggers only when vocals are singing, allowing keys to swell back up during vocal pauses.BenefitMaintain richness and foundation of the keys while keeping vocals present, eliminating need for manual automation.
- Free Plugin Alternative with TDR NovaPlugin ChoiceTDR Nova is identified as the best free option for Dynamic EQ and sidechain compression.Setup• Sidechain from vocal to instrument track • Enable external sidechain in TDR Nova • Turn on analyzer to visualize sidechain inputControlTurn on any band, enable threshold, and let that band reduce based on vocal activity; option to create narrow bands for specific resonance suppression.ApplicationWorks best with wider bands rather than extreme narrow settings; accessible to users of any DAW.
- Kick-Specific Sidechain Using Drum FilteringChallengeWhen sidechaining drums to bass, all drum elements (snare and hi-hat) trigger compression, creating undesired pumping.Technique• Route drum stem to a new auxiliary track called 'drum filter' • Place an EQ on the filter track and isolate only kick frequencies • Disconnect filter track from master outputImplementationSidechain the drum filter track to the bass compressor so only kick frequencies trigger the compression, not snare or hi-hat.ResultBass movement aligns with kick groove while maintaining natural rhythm; works with stock plugins and creative routing in any DAW.
- Dialing In Settings and Final ConsiderationsCritical PracticeListen on multiple systems with good bass response and dial in settings until they sound tight and controlled across different monitoring environments.Mixing Goals• Ensure kick and bass work together to support the song's groove • Avoid bass rumbling over everything in punchy mixes • Maintain phase and harmonic cohesionPlugin PhilosophyWide bands with gentle compression create more pleasing and cohesive results than premium space-creating plugins; manual setup prevents cutting excessive holes in tracks.TakeawayAll techniques depend on individual taste and interpretation; priority is hearing exactly what's happening and achieving the desired sonic result.




